What is PPC?
by Fahad Muhammad

We’ve all heard the old adage a picture is worth a thousand words.
But, do you know what words are worth, or more precisely what the word ‘best mesothelioma lawyer’ is worth?
That phrase is going to cost you $935 – it’s one of the most expensive keywords in the US for Pay-Per-Click (PPC) advertising.
Sounds steep, right?
However, the legal businesses bidding on this keyword will calmly tell you that the keyword is actually worth a lot more in ROI (Return on Investment).
Running PPC campaigns for your business helps you get brand exposure and establish thought leadership in front of your potential customers, by just paying for ads that get clicked.
Whether you’re running a B2B or a B2C business, investing in PPC campaigns allows you to not only promote your product or service to your target audience, but do so for audiences who are actively looking for solutions. The campaigns help your brand get massive reach and exposure without spending more than you’re willing to.
How does this happen? Well, let’s begin.
What’s PPC?
PPC or pay-per-click is an internet marketing model also referred to as CPC (cost-per-click) where advertisers bid to have their ads shown on search engine results and websites for the purpose of promoting an offer.
The advertiser pays publishers every time a visitor clicks their ad, hence the model is known as pay-per-click, as advertisers only pay when the visitor clicks their ad. If a visitor sees an ad but doesn’t click it, the advertiser is made aware of the impression but doesn’t have to pay as no click took place.
Watch this video to get the full gist of what PPC marketing is:
With the help of ad impression and ad click data advertisers are able to optimize their PPC campaign ads to fulfil their campaign goals, which can vary from getting app downloads to getting free trial sign-ups.
The importance of PPC marketing
PPC campaigns help marketers increase visibility for their ads, build brand awareness and measure clearly defined metrics and campaign goals helping them create better, more optimized campaigns in the future.
In fact, according to Hannapin Marketing, advertisers are expanding their PPC budgets with 79% of advertisers saying they have a higher PPC budget in 2017 than in 2016 with a plan to have an even higher budget in 2018.
As far as the most effective PPC channels go, search ads are dominating while social ads are lagging behind:

In 2017, the overall budget of advertisers continues to expand with 72% spending significantly more on social ads compared to last year. Over 60% are spending more on text ads and mobile ads, while there is a 18% decrease in display network ad spend.
Creating and launching an effective PPC campaign, whether on social or search takes a lot of research and intuitive thinking. To create PPC campaigns with a purpose it’s important you know everything there is to know about the PPC advertising platform you’re using.
This guide will help you do exactly that – by taking you on a step by step journey to creating your PPC campaign from scratch on the following advertising platforms:
You will get to see the exact steps you need to take to create PPC campaigns on each platform, and get insights on features each platform offers to optimize your advertising campaigns.
The next chapter of the guide is going to focus on Google Ads, discussed in the chapter will be the process of setting up your first Google Ads PPC campaign. The chapter will also explain how you can use the power of Google Analytics reports in conjunction with your Google Ads account to gather and analyze important user behaviour metrics.
Google Ads is Google’s online advertising program that enables marketers to create online ads to promote their product/services to their target audiences.
The Google Ads platform runs on Pay-Per-Click (PPC) advertising i.e. you have to pay every time a visitor clicks an ad.
Marketers rely on Google Ads as a promotion platform because:
Think of the Google Ads platform as an online marketplace, where businesses pay to have their ads shown at the top of the search results page or get displayed prominently on other websites.
In the coming sections of the chapter, we’re going to discuss the structure of the Ads account dashboard, talking about metrics, bids and the process of selecting keywords.
The chapter will also explain the process of setting up Google Search and Display network ad campaigns, and showcase what metrics and reports you need to track in your Google Analytics account to gather valuable Google Ads data.
The Google Ads new dashboard
This section will highlight the key features in the new Googles Ads experience :

Starting from the left side i.e. part 1 you’ll find the navigation menu. From the menu you can view all of your campaigns be it video, shopping or hotel campaigns.

Part 2 consists of the page menu of each campaign. For example, if you click search campaigns you can see the page menu items such as ad groups, post-click landing pages attached to your ads, keywords, demographics, and ad placements.

Par3 of the interface is the subpage menu, you can view auction insights and keyword performance.

Part 4 is the header toolbar, click the small chart icon on the toolbar to see the different Google Ads reports.


Part 5 is the table toolbar of the sub-menu, you can filter, segment, and customized your columns.
![]()
Google Ads Campaign Structure
This is what the Google Ads campaign structure looks like:
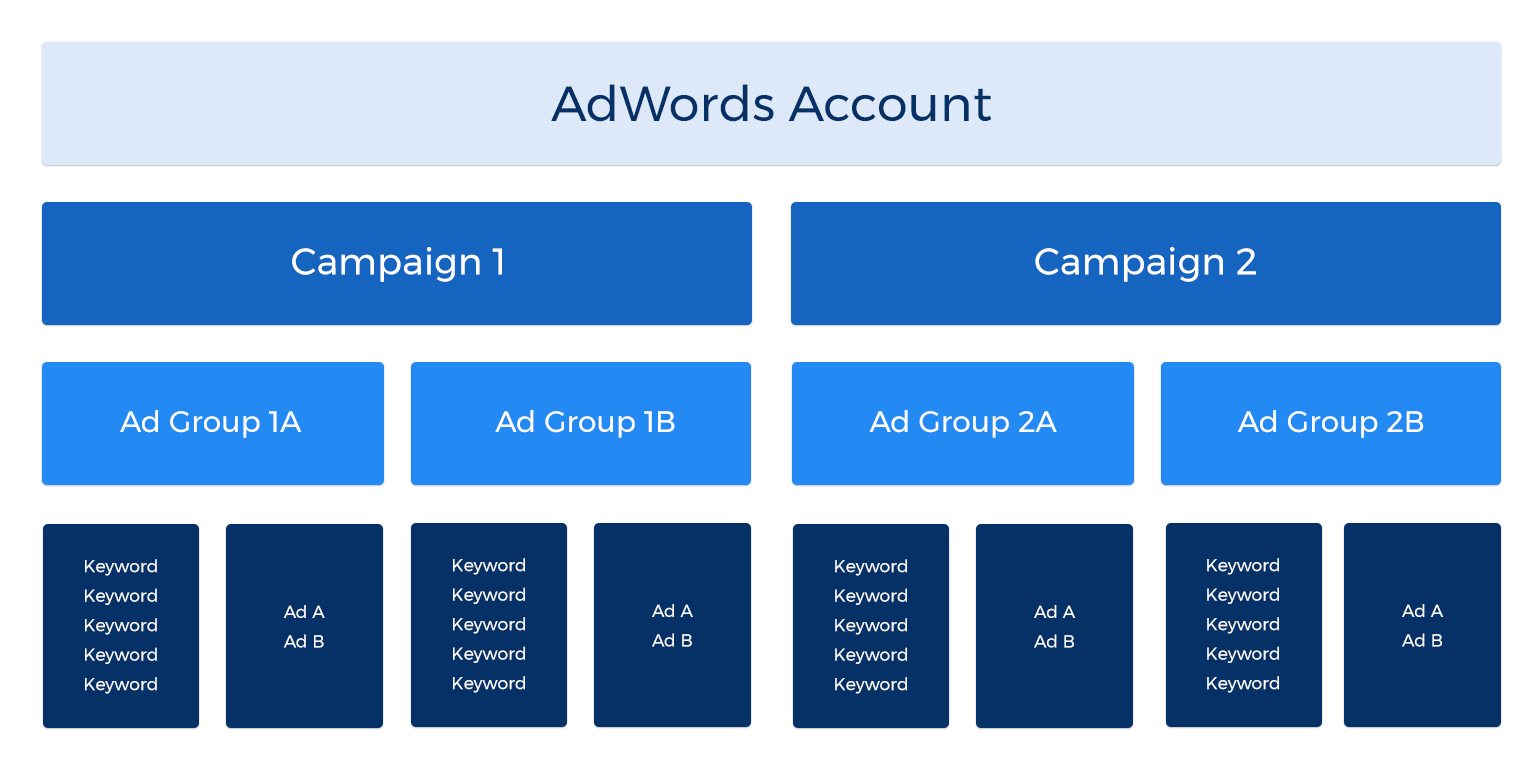
Keywords are the primary element of an ad campaign, keywords combined together or sometimes even a single keyword makes an ad group.
All ad groups come under a unique ad campaign, Google Ads allows you to create as many as 10,000 campaigns per account.
Here’s a detailed breakdown of the campaign structure, from top to bottom.
1. Campaigns
Campaigns are at the highest level of the Google Ads account. Each campaign consists of different ad groups which contain keywords. To structure campaigns appropriately focus on building your campaigns properly from the start.
One way to organize your campaigns is to look at the product or services available in your website navigation menu. You can then create a unique campaign for each menu item and create ad groups based on the drop down section of the navigation.
This will also help you manage your budget, as you can analyze which campaign is bringing in more revenue.
For example, Mr.Rooter can run three main campaigns based on their website navigation:
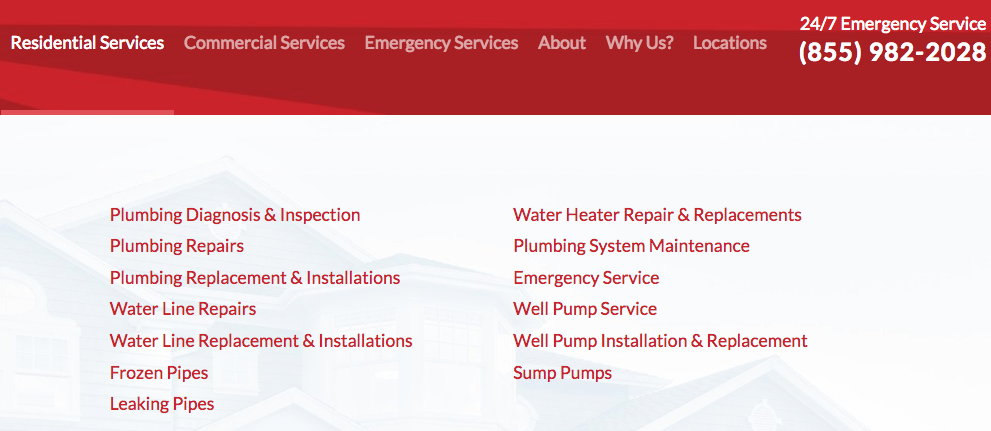
For each campaign you can create ad groups relevant to the service, for instance, the ad groups related to the residential services campaigns can include:
This also helps you set up a decent budget at the campaign level.
The best way to set up a campaign budget is to divide your entire budget on the number of days you intend to run your campaign. For example, if you are planning to run a campaign for one month, divide your budget by 30 days.
2. Ad Groups
Each campaign consists of one or more ad groups, an ad group is a set of keywords. When a user performs a Google search with your added keywords in the ad group, Google picks one of your ads to show up in the search results.
Google Ads uses an algorithmic placement based on keywords, placement, and audience while deciding where to place ads within its network.
A Single Keyword Ad Group (SKAGs) consists of a single keyword, if you are sure (based on data) that a particular keyword is attracting more traffic to your site, SKAGs can save you a lot of advertising money.
Management Placement helps you manage the placement of your ad group. For example, if you notice that you are receiving more relevant traffic from Forbes for your display ads you can bid higher on that particular site to get more results.
3. Keywords
In Google Ads, keywords are the most critical targeting factor, they describe what your products or services are, and help the search engine trigger an ad when a user types a search query.
How does Google Ads auction system work?
Google uses an auction system to rank ads in the search results. The auction system determines the cost for each ad placement.
How does the Google Ads bid system work?
A bid is an amount each advertiser is willing to pay to show their ads in the search results. All the ad positions are determined by bids. However, the cost each advertiser has to pay is determined by the second price auction.
The second price auction is a system where the highest paying bidder, pays the bid of the second highest bidder.
In Google Ads, advertisers only pay when they actually receive a click on their ad. It does not matter how much you are willing to pay for your ad to come at the first position – what matters is the ad click-through-rate (CTR).
If more users are clicking an ad, Google’s algorithm will qualify that ad as more relevant and will show it at the first position even if the bidding price was lower than other ads with lower CTR.
To understand this mechanism we need to first understand what quality score is.
Quality Score
Quality score is a metric used by Google algorithm to determine your ad rank. Google collects user feedback in the form of click-through-rate (CTR), ad relevance and post-click landing page experience.
Higher quality scores help advertisers gain a higher position in SERPs.
1. Expected Clickthrough Rate
Here’s how Google defines expected clickthrough rate:
A keyword status that measures how likely it is that your ads will get clicked when shown for that keyword, irrespective of your ad’s position, extensions, and other ad formats that may affect the visibility of your ads.
The expected CTR determines whether your keyword is likely to get a user to click your ads. Google Ads essentially takes into account the past performance of keyword based on your ad’s position. Google provides an expected CTR for a keyword of your campaign based on the assumption that the search term will match that keyword exactly.
When a user has typed in the search query and the auction is taking place, Google Ads calculates a more accurate expected clickthrough rate based on the search term, type of device and other auction factors.
Your expected CTR can have three statuses – average, above average and below average.
The expected clickthrough rate is a prediction, the status helps you determine how the keyword performs within your campaign and also across all other advertiser’s accounts.
The expected CTR is calculated by not factoring in the ad position and other factors that affect ad visibility such as ad extensions etc.
An important thing to remember about expected CTR is that it’s different than the clickthrough rate value that you see in your Google Ads account.
2. Ad Relevance
Ad relevance is a status that measures the message match between your keyword and your ad. For example, Google determines whether someone searching for a keyword you’ve bid finds your ad relevant to the keyword search or not
There are three ad relevance statuses – below average, average and above average.
You can use the ad relevance status to help identify which keywords aren’t relevant to your ad and make changes accordingly so that your ad has an impact on your audience.
3. post-click landing page Experience
Google measures post-click landing page experience by determining how relevant your post-click landing page is to your ad, and how much it relates to the user’s search term. The post-click landing page experience status describes whether the post-click landing page provided a good experience for the visitor who landed on the page after clicking the ad.
post-click landing pages that are clear and offer relevant information to visitors get a status of average and above average. Pages that don’t offer relevant information, seem untrustworthy or are not mobile responsive get a below average status.
To get a high-quality score and improve Ad Rank, it is extremely important you take care of keywords, ad and post-click landing page relevance as well as set an appropriate maximum bid for your campaigns.
Another factor important in determining ad rank is the format of an ad. Ad formats are based on ad extensions. These extensions provide context and more information about your business, for example, your business address, phone number, and customer rating.
Running PPC campaigns on Search Networks and Display Network
Google Ads is divided into two types of ad networks, the Search and the Display Network. This section of the chapter will focus on the account setup process of Google Search and Display ads.
Setting up search ad campaigns on Google Ads
Google search ads appear next to Google search results when users type in queries looking for products and services they need.
Setting up your Google Ads search campaigns can be summed up in the following three steps:
With millions of Google searches per day, search ads give you the opportunity to ensure that customers notice your brand, consider your offer and perform the desired action.
Here’s the step by step process of creating search ad campaigns in Google Ads.
Create new campaign
After you’ve signed up for a Google Ads account, click the ‘Create a New Campaign’ option and select ‘Search Network’ as your campaign type:


Select campaign goal
You can now select the single goal that would make your campaign successful, you have the option of selecting Sales, Leads, or Website Traffic as your campaign goal:

When selecting a campaign goal, Google Ads suggests campaign settings that are aimed at helping you obtain your selected goal.
You can use one goal for each campaign, the goal should be the main thing you want to achieve via your business.
Google Adds also gives you the option of creating a campaign without a goal. The option lets you create your campaign step-by-step without any goal guidance provided by the network. You can choose a goal later, after you have created the campaign.
Let’s select the ‘Website Traffic’ goal for the purpose of this post.
Enter setup details
After selecting the goal, Google Ads requires you to add details of how you’re going to reach your goal. The set-up details help customize your campaigns to focus on settings and features that help you get the user actions that are the most important to your business.
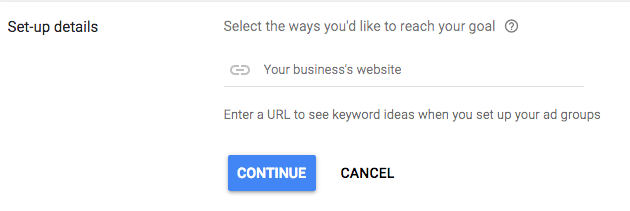
You can now enter your business’ URL, and Google Ads will generate keyword ideas when you are setting up your ad groups.
Select campaign name and networks
Next you need to name your campaign, and choose whether or not you want Google search partners to show your ads too:
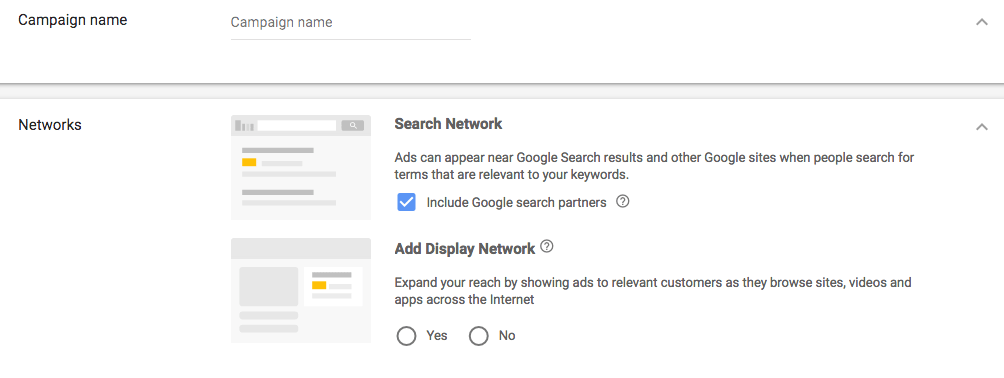
Google search partners are the sites in the Search Network that partner with Google to show ads on their search results. Google Ads pre-selects the ‘Include Google search partners’ option.
Select Location
Location helps you target ads at people located in a specific area. You can use the ‘Advanced Search’ option, and add multiple locations in the form of a county, cities, or even postcodes, etc.
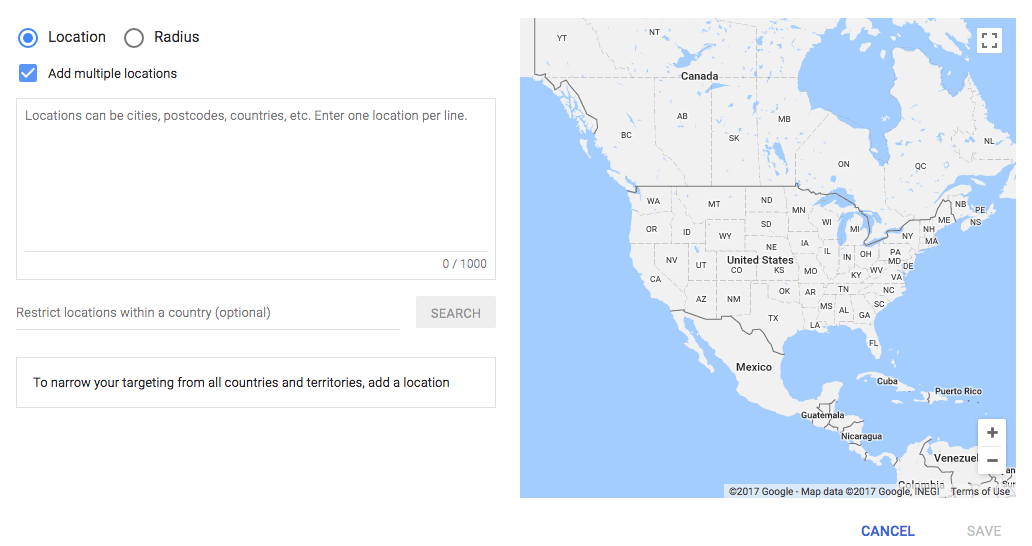
You also have the option to restrict locations, where you don’t want your ads to show.
Select language
By targeting specific languages, you can restrict where your ads can appear based on the user’s language settings and the language your website is in. Google Ads pre-selects ‘English’ as the language, however, you can choose another language:

Select bid strategy
Your bidding determines how you pay for users to interact with your ads. If you bid a sufficient amount and your ad has a good quality score, your ad will earn a higher rank in ad auctions:
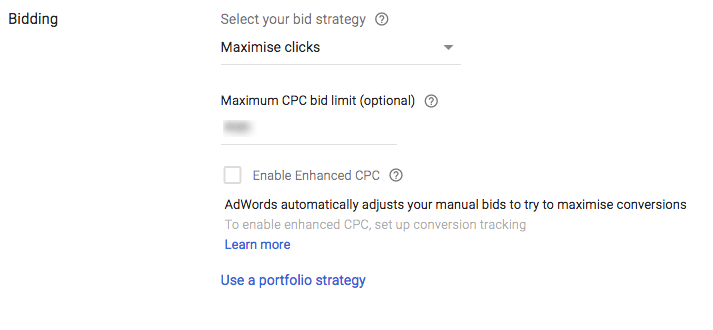
You can choose between the following automated bid strategies:
You can also choose a manual CPC option, where you set your maximum CPC for ads.
With the CPC option, you can ‘Enable Enhanced CPC’, this helps you get more conversions by raising your bids for clicks that seem more likely to lead to conversions, and lowering your bids for clicks that are less likely to convert. The Enable Enhanced CPC option helps you get more conversions in your budget.
Set daily budget
Your daily budget determines the most you are willing to spend each day on your campaign:

There are two ad delivery methods to choose from:
Select start and end dates
You can now select the start and end dates of the search campaign. Your ads continue to run unless you specify an end date:

Add Sitelink, callout, and call extensions
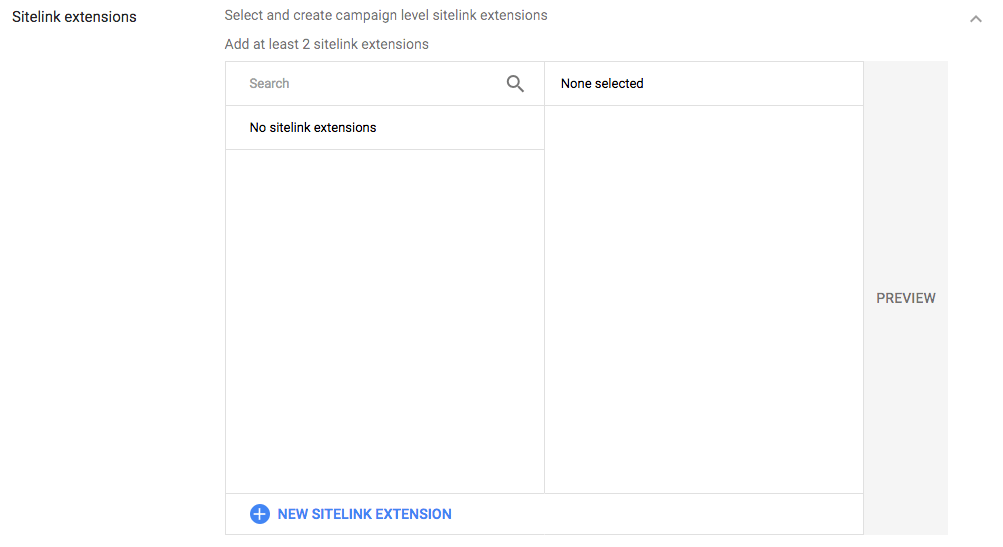
Sitelink extensions are additional links that you add to your ad. The links can take people to specific pages on your website when a user clicks on these links they jump right to that section of the website.
Here’s how sitelink extensions appear:

You have the option of adding at least 2 sitelink extensions:
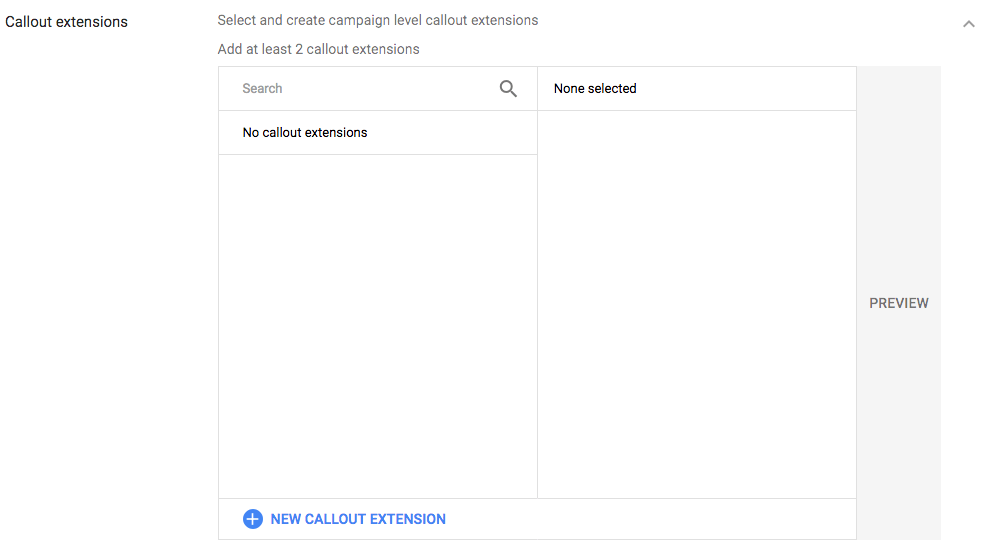
With callout extensions, you can include additional text to your ad, to show more detailed information about your business, product or offers. You should add at least 2 call out extensions with search ads:
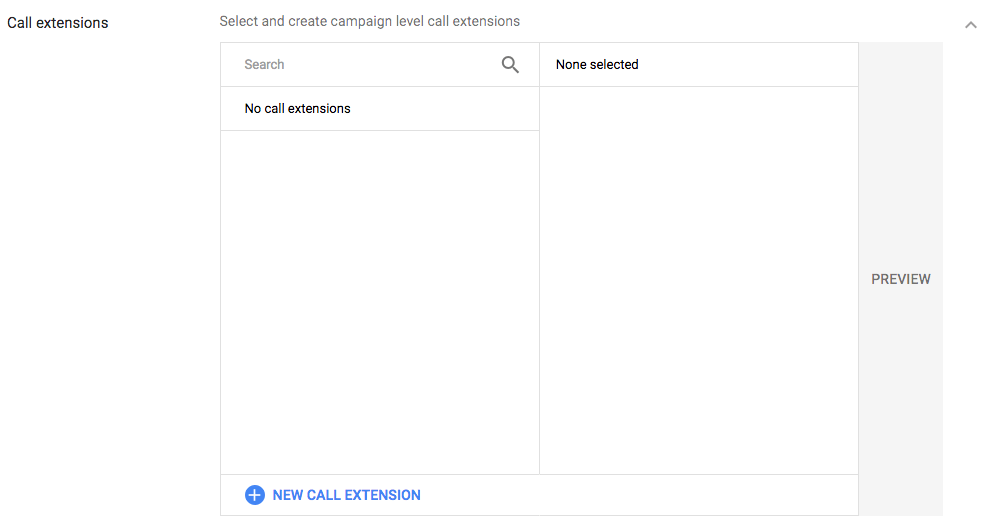
Call extensions let you add phone numbers on your ads, which give you the opportunity to increase click-through rates:
Set up ad groups
Once you’re done with the campaign settings, you can set up ad groups. An ad group contains one or more ads and a set of relevant keywords. For optimum results, it is best to focus all the ads and keywords in an ad group on one product or service:
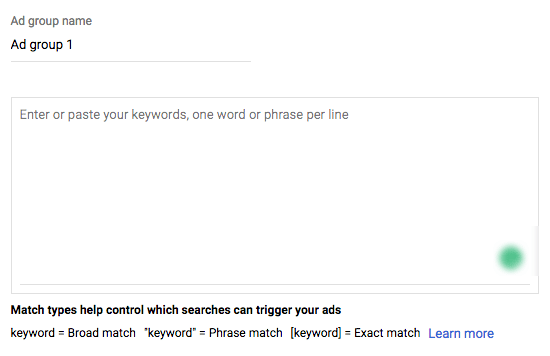
You can create your ad group name, and enter your keywords one per line.
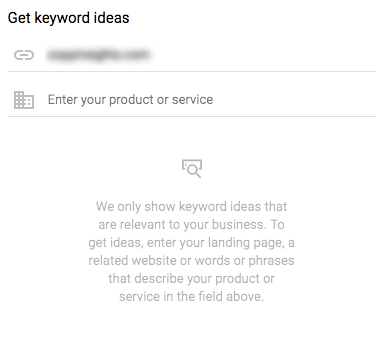
If you need help with keywords, you can take help from the ‘Get keyword ideas’ option:
There are four different types of keywords in Pay-Per-Click (PPC) search ad campaigns.
If you need help finding relevant keywords, you can use your Site Search Reports to take out keyword suggestions.
Taking out Relevant Keywords with Site Search Reports
An optimized way to expand your targeted keywords list is to use Site Search Reports. This report gives you a list of keywords which users were typing in your site search area when they were on your site. This gives you an idea of what users expected to find out while on your website.
You can set up site search by doing the following in your Google Analytics account:
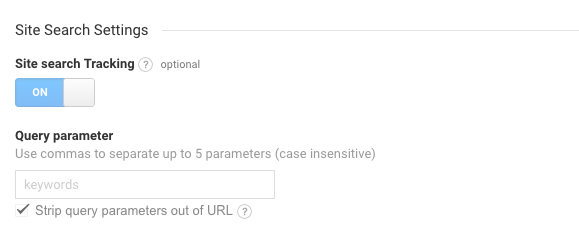
Once you are done setting up Site Search Tracking it’s time to learn how site search system works. This system works once you define query parameters.
Access query parameter reports in Analytics
To access keywords collected from your website search bar in your Google Analytics account. Go to Behavior > Site Search > Search Terms. In the reports section look at Total Unique Searches column. These are the queries which users searched for in your website search bar.
Select relevant keywords and add them either in ad groups or run single keywords ad campaigns (SKAGs) campaigns in Google Ads.
Create ads
It’s now time to create your text ad. For every ad group, it’s always best to create three ads that are relevant to your keywords:

After you’ve created your text ad, you can see a desktop and mobile preview of the ad.
Now that we’ve discussed how to set-up your search ad campaigns in Google Ads it is now to discuss how to optimize your search ads.
How to create optimized search ads
You have little room for error when it comes to search ads, as you only have a handful of characters at your disposal to impress your audience.
This is what a typical search ad looks like:

To ensure that users click on your search ads, it’s best to create ads with the following components.
Persuasive and relevant ad copy
When creating ad copy, think like your target audience and showcase your offer in a way that they would like reading about. Keep in mind user intent and craft ad copy that answers the exact questions users have on their mind.
Think about your offer – what does your product do for customers? How does it help customers solve their problem? What differentiates you from the competition? Create ad copy that answers these questions.
The ad copy should also be relevant to the user’s search query.
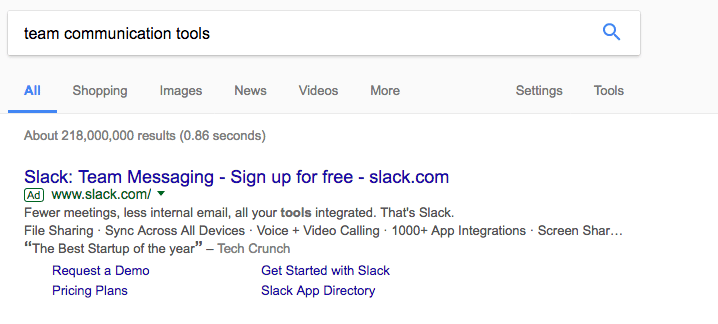
A Google search for ‘team communication tools’ shows Slack’s ad that is not only relevant to the search query phrase, but also features a testimonial and description of what the tool can do:
Use relevant ad extensions
Another great way to optimize your ads is to apply extensions such as the call extension and review extension to share additional information about your product/service with the user.
You can use the following extensions with your ads:
1. Location Extension
Showing your location in the ad adds trust and credibility to it. Also, if a visitor wants to actually visit you they can quickly get the information from the ad.
2. Callout Extension
Callout extensions promote unique offers to your visitors, like a ‘free trial’ and a ’24
hour customer service:

3. Call Extension
Call extensions feature your contact number with the ad, so visitors can call if they have questions about your service. Adding a phone number with your ad increases visitors’ trust in your service.

4. Review Extension
This extension allows you to add quotes or ranking from your previous clients, reviews from renowned companies work best with your ads.
Getaround uses the review extension to highlight a testimonial by Huffington Post:

Connect all ads with relevant post-click landing pages
A post-click landing page is a standalone page created to fulfill a single purpose. The purpose of the page can vary because of campaign goals or where the visitor is in the marketing funnel. The pages can be used for a variety of campaigns from getting registrants for your webinar, downloading an ebook or white paper, to getting signups for your SaaS free trial.
When your ad is connected to a relevant post-click landing page you ensure that the visitor finds the answer to their search question on a distraction-free page, making it easier for them to convert for the given offer.
While your website homepage has multiple objectives, as it deals with a multitude of company products and updates at one time, a post-click landing page focuses on one singular offer or campaign.
Your ad copy is directed toward a single offer, this could be a specific feature you’re promoting, a time-sensitive promotion or a free trial. When you connect your ad to a dedicated post-click landing page you ensure that the visitor only sees the offer that you talked about in your ad copy, thus establishing relevancy and improving your chances of conversions.
This is what Jira does with their ad and post-click landing page.
The ad talks about project management, the tool’s agile functionality, and a free trial:

This is the post-click landing page visitors are brought to after clicking the ad:
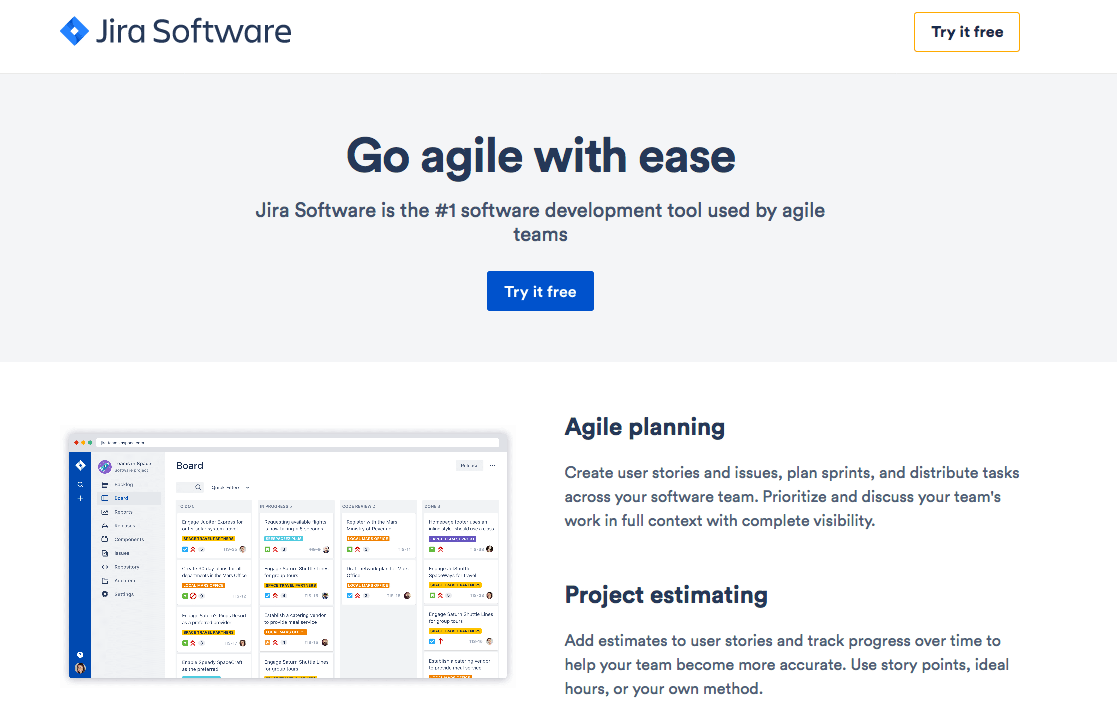
The post-click landing page also showcases the free trial, project management and agile planning features of the tool – reassuring visitors that they have landed at the right place.
When you connect PPC ads with relevant post-click landing pages you get higher quality scores because you get an above-average status in the post-click landing page experience category which helps increase your ad rank.
Let’s move onto the setup process of Google Display Network.
What is Google Display Network (GDN)?
Google Display Network (GDN) allows advertisers to run contextual ads on a network of
over 2 million sites, blogs apps, and other online destinations which can show ads and can reach over 90 percent of internet users from around the world.
Display ads are similar to demand generation, and are a passive form of advertising – so advertising factors like visual appeal, location and, relevancy are really important.
The Google Ads platform is a versatile tool which helps advertisers manage all these factors. For example, for an ad’s visual appeal it has tools such as the Ad gallery and display ad builder that help you build strong and relevant display campaigns. Plus, with the help of demographic options you can exclude any geographic locations that aren’t performing well.
Your approach for running display campaigns should not be limited to brand awareness. Instead, the ultimate goal should be to build trust between the target audience and your brand.
Defining buyer personas is an important element of your marketing structure, remember, not to commit these mistakes and align your paid marketing efforts with a highly targeted audience. And never forget to connect all your ads with a dedicated post-click landing page.
Mentioned below is the campaign setup process of Google Display Network (GDN) campaigns, how to analyze reports and optimize campaigns.
Getting started with Google Display Network
Let’s dive into the new dashboard and learn how to set up display campaigns, look at different reports and finally optimize Google Ads display campaigns with the help of your reports.
Setting up Google Display Campaigns
Click the ‘new campaign’ button to add a new campaign:

Google Ads recommends you set up your goals at this step so that it can provide you with customized features for your display campaign success.
Campaign Name
Once you select which campaign goal you want to move forward with, give your campaign a name. It’s better to select your business categories as a campaign name.
For example, if you are run an online clothing store then the campaign name could be ‘men jeans chino’ or ‘men jeans slim fit’. Each jean fit type could have its own campaigns and hence individual ad groups.
Location
Location targeting helps you find customers in your targeted area. Google Ads campaigns provide you with a variety of targeting options, for example, you can even target people in a specific location in a radius just like this.
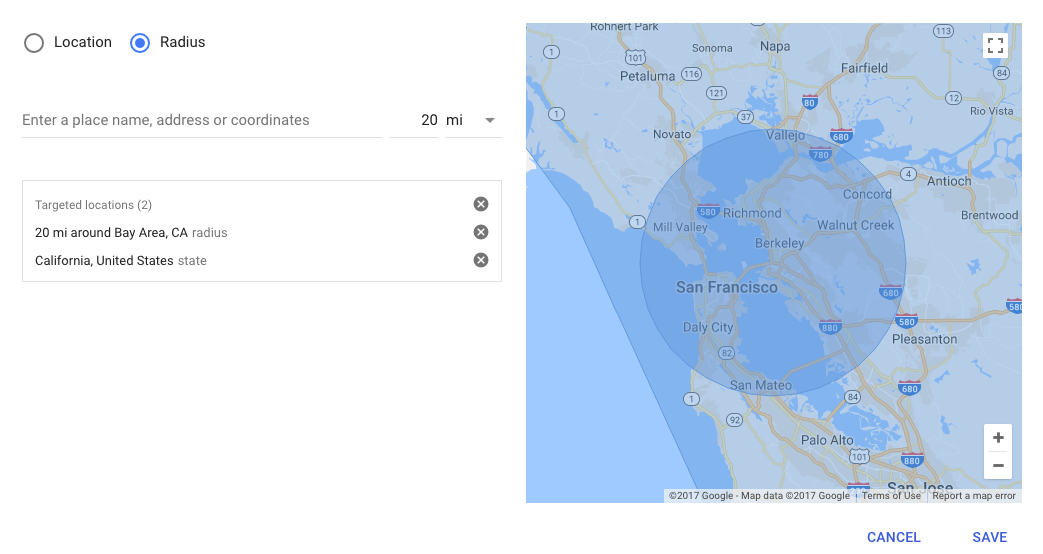
You can select the size of the radius and enter the name of the place or its coordinates.
Click the save button and you are done.
Language
Google Ads does not translate ads or keywords so ads appear for customers in the same language based on their language setting.
Bidding
Bidding strategy varies with goals. It depends on whether you want clicks, impressions, conversions, or views. So, your business goals should be aligned with your paid marketing campaigns.
Google Ads’ smart bidding system uses an algorithm based machine learning system to automate bid strategies. There are mainly four smart bidding strategies you can use:
Daily budget
Daily budget is an estimated amount which you allocate for the ads to appear on Google’s partner websites.
The budget estimates tell you how many estimated clicks your ad can get in a day. It’s important to note that if you spend less than the recommended amount there is a possibility your ads may not appear for every search result.
Remember Google Ads can consume the budget up to 2 times quicker depending on the number of searches, so you might exceed your average daily budget.
Ad group name
We have already discussed that an ad group is a structural element of the Google Ads account. Ad groups help you organize paid ad campaigns as each ad group is made up of one or several ads based on similar themes and keywords.
Audience Targeting
Google Ads audience targeting lets advertisers target audiences who have already shown an interest in a specific product or service they are offering.
With your help, Google Ads can collect data from your audience source to improve the bidding and help optimize your reach. It provides you with a wide variety of options to reach your desired audience.
Let’s see how Google Ads defines different types of audiences in the campaign set up process:
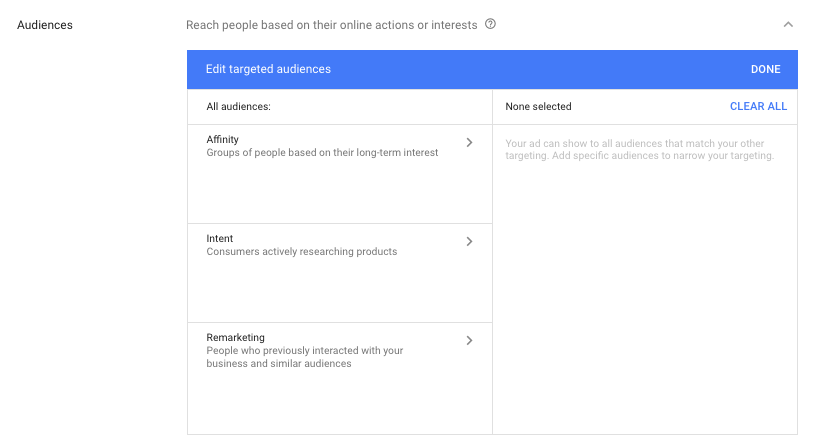
Affinity audience
Advertisers know who they are targeting, but targeting the audience who really want to purchase from you is challenging. Affinity audience is a group which shows an interest in a specific category. This helps you target an audience segment who cares about what you are offering.
Custom affinity targeting
Custom affinity targeting is a granular form of affinity targeting where you can create your own specific custom audience by inserting keywords and specific URLs.
Audience intent
Helping Google Ads understand your audience intentions is a great way to reach new audiences beyond the pre-defined audience categories.
Custom intent audience
Like affinity audience, you can define your own custom intent audience.
Google Ads Display Campaign targeting options
Display advertising can reach up to 90% of the total internet audience across millions of websites. Use Google Ads targeting tools to show your ads to the right people at the right time.
Contextual advertising
Contextual advertising lets you connect with an audience who shows interest in products or services similar to those that you are offering.
Google’s algorithm understands webpages with the help of keywords, linguistics page structure and several other factors. So using keywords wisely can help you achieve goals. You can use the keywords planner tool and reach the audience with high buying intent.
Automated targeting
Automatic targeting helps you achieve more conversions without incurring additional costs. Since display advertising is a part of Google Ads contextual engine, so it has the capacity to place your ads on most relevant websites at the right time. With this targeting option, you can reach to more potential customers, identify relevant customers and increase your reach.
Conservative vs aggressive targeting
If you want to expand your reach use the aggressive targeting option. However, the problem with the aggressive targeting option is that it will consume your advertising budget more aggressively to reach new potential customers, and your average cost per customer may go up.

But with the conservative option, you stay close to your target CPA.
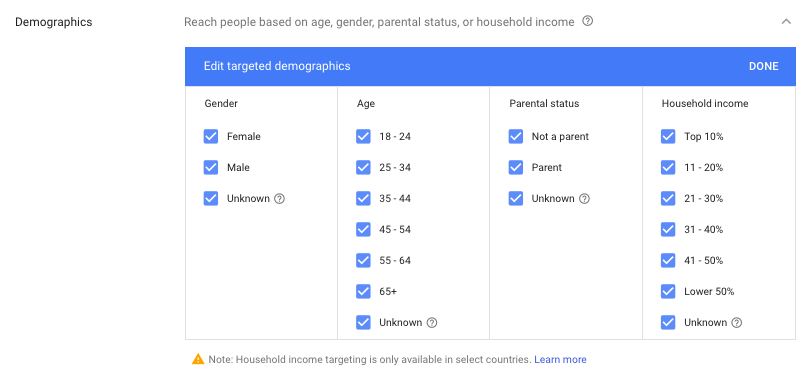
Demographics
If you have already defined your marketing persona, select the relevant options while setting up your campaign.
Where do you want to show your ads?
The Google algorithm analyzes the content of each web page to understand its central theme. It then matches all your selected keywords, where you want your ads to be shown on its network.
In search advertising, you can mainly use keywords to target different queries. But with display ads, you have a variety of options, you can place ads on URLs of your choice, you can select topics of your interest, and target a specific geographical area.
a) Keywords:
While setting up contextual advertising, display keywords play an important role.
For contextual advertising, you should only use those keywords which have performed well. To do so, take out at least 5 to 20 keywords which have already performed well while running campaigns on Search Network and observe how they perform on display campaigns.
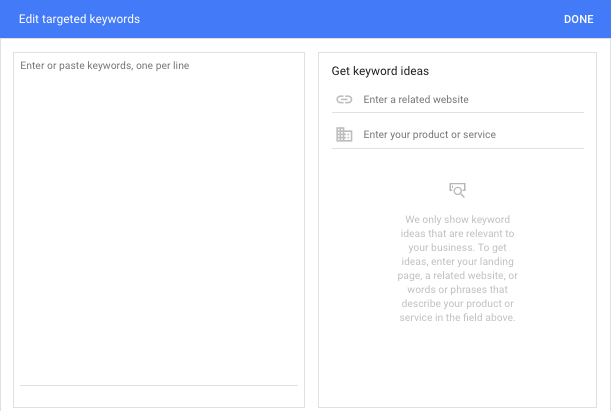
If you are not already running ad campaigns look at the product or service you are providing and build a category for each product or service. For instance, if you are running an online clothing store, then your categories could be:
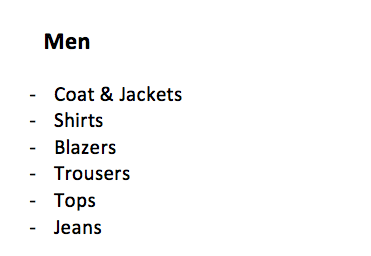
Now with the help of the keyword planner tool take out specific search words for each category, this process will help you take out appropriate keywords for each category. This will help you reach your target customers easily and manage your account.
b) Topic
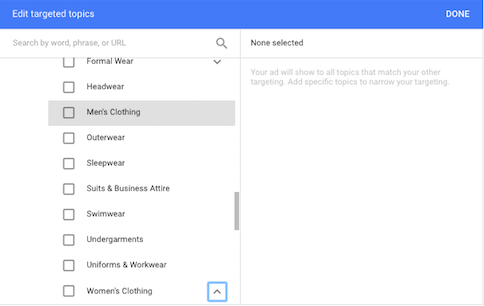
Each website caters to a specific type of audience. Topic targeting lets you place your ads on Display Network sites which have content related to your ads.
For example, if you are selling clothes online your topic could be shopping, apparel and men’s clothing and so on.
c) Placements
The placement management capability lets you display ads on a list of your selected websites. You can showcase your display ads on millions of websites, blogs, apps, and Google owned properties like Youtube.
One of the better ways to start with placements is to go to your Google analytics account under Acquisition tab look for the referral tab and analyze top sites responsible for a large chunk of traffic.
Then select 5 to 10 sites that match your target personas.
Types of Display ads
You can advertise the following types of display ads on Google Ads:
2. Image ads: You can create image ads either with ad gallery templates or the best option is to upload your own custom images. For more specifications and pixel dimensions you can read this article.
3. Animated ads: Animated ads are similar to gifs. The animation ads must stop after 30 seconds, the ads can loop or repeat, but the animation needs to stop at the 30-second mark.
4. Rich media ads: Rich media ads can showcase advanced features like video, audio, or other elements that encourage users to interact with the ad. The ad also has the capability to expand, float, etc. ensuring the audience is engaged and wants to click through.
5. Video ads: The Google Ads interface lets you run video ads on Youtube and the Display Network. Your potential customers can see your video ad content before, during or after their video content. Remember the publisher has the freedom to place ads within the video content.
6. Mobile ads: With Google Ads, you can exclusively target mobile users. As more users spend time on their mobile devices, targeting mobile users is a must.
7. Gmail sponsored ads: Gmail sponsored promotions (GPS) only show up in personal Gmail boxes. These small ads look like emails. The ad can accommodate 25 character text headline and 100 characters of body text.
Optimizing display ads
This is what a typical Google display ad looks like:
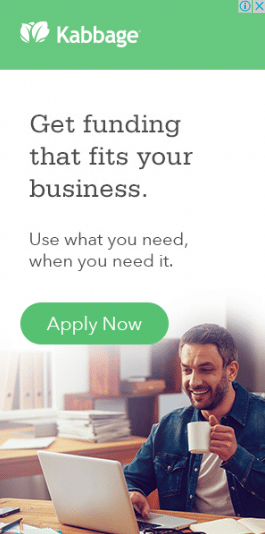
Display network ads give you a little more room to be creative as they include additional formats, such as image, video and rich media types. To create effective display ads, make sure the image and copy are relevant, so the visitor can make a natural connection between the contents of the ad.
Another thing to take care of in display ads is branding, make sure that your branding is on point, so when the visitors clicks through to the post-click landing page they know they’ve come to the right page.
This is what SEO Powersuite does with their ad and post-click landing page.
Here’s the display ad:

And, this is the post-click landing page visitors are directed to:
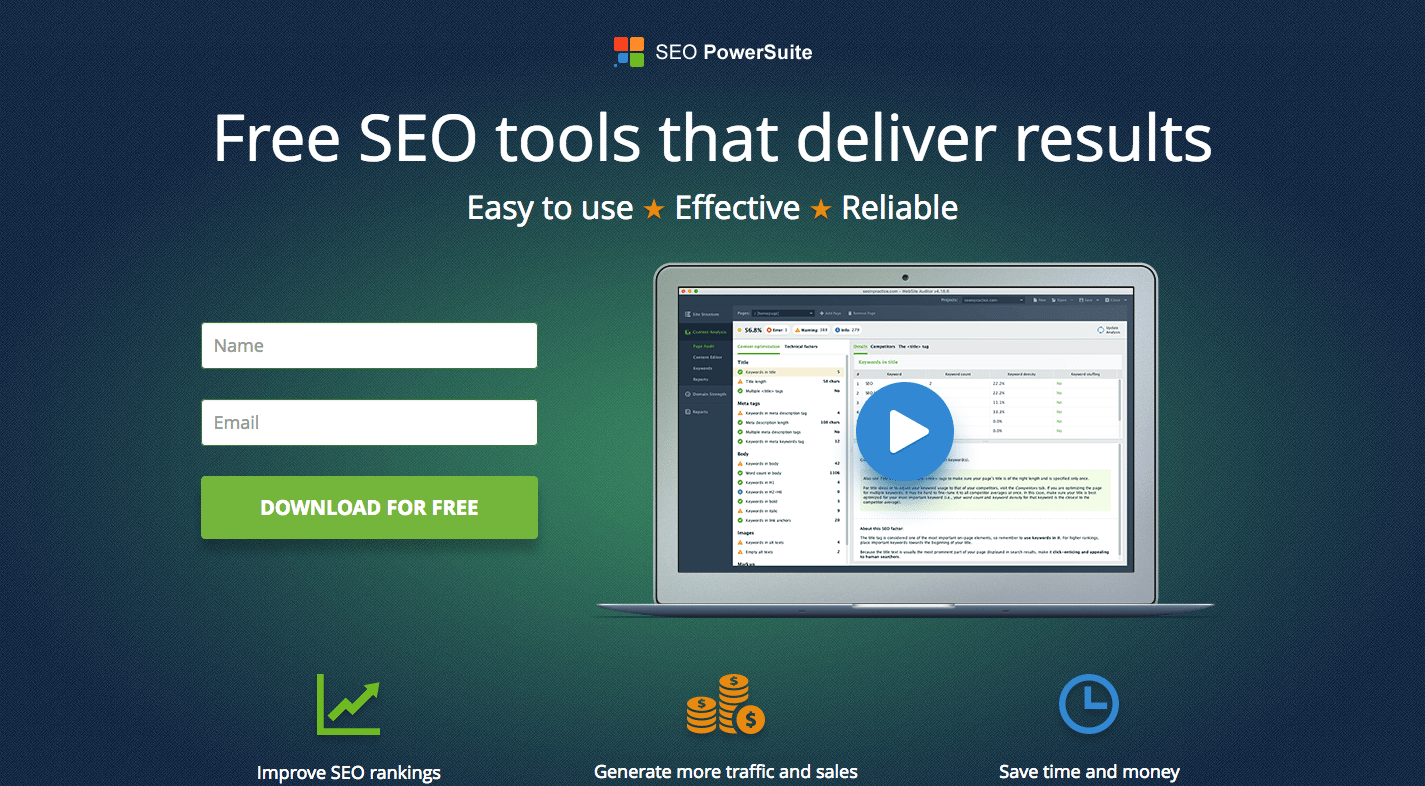
The display ad and corresponding post-click landing page have the same branding and feature the same message, which helps establish message-match in the mind of the user.
Including a CTA button in your display ads helps guide visitors toward the click.
Make sure your ads are relevant, have action-oriented copy and are descriptive so that they stand out and the visitor feels compelled to click them.
Getting an ad click is exciting because you’re one step closer to getting a conversion, however, it’s important to remember that the optimization process doesn’t end with the ad copy.
If you want your visitors to follow through with their ad click, and actually get what you’re offering you should always connect your PPC ads with relevant post-click landing pages.
How to integrate Google Ads with Google Analytics
In this section, we are going to link these two accounts and see how the combined structure works and how you can collect insights.
When people go to search engines they are actually looking for a specific solution or an answer to their problem. Depending on the keywords they use, you can measure their intent level – whether they are looking to get more information or are looking to buy a specific product.
Targeting the right audience at the right time can increase the probability that users will take the actions you want them to take.
Google Analytics is a such a versatile and systematic tool that, if used properly, it can become a step-by-step guide to measuring your business’ success. And when you add Google Ads with Analytics, you get access to information about a highly targeted audience – an audience who is looking to solve their problems.
Link your Google Analytics with your post-click landing page
To start collecting data on your Google Analytics account you need to connect it with your post-click landing page. Although the process is quite simple, however, a small mistake can jeopardize the whole data collection process.
So, let’s start the process:
Go to your Google Analytics admin section and under property setting, you can find the tracking code tab.
![]()
Click the tracking code button and you can see the javascript code snippet.
Here is the snippet example:

Copy this code and paste it into the post-click landing page Google Analytics tab.
You now need to insert this code on your post-click landing page. If you are using an Instapage post-click landing page for your campaigns this process becomes incredibly easy:

Select Google Analytics from Analytics tab.

Paste the Google Analytics code in the designated field.
And you’re done!
Integrate Google Ads with Google Analytics
Google Ads is a complete advertising solution which gives marketers autonomy to run their campaigns the way they want.
Linking your Google Ads account with Analytics help you understand the customer cycle. It tells you how your potential customers are interacting with your brand and you can easily analyze different touch points during their customer journey.
It helps marketers see beyond their successes and failures. In other words, it does not just give you a notification on which campaign is failing but, can also help you understand what happened to visitors who did not complete their purchase or fulfill your desired goals.
This information can help you understand why your campaigns are not performing well. Is it due to suboptimal targeting, whether the post-click landing pages were poorly designed or the keywords and ad groups are not performing well.

Enable Auto-Tagging
Google recommends using auto-tagging in order for Analytics to display details about Google Ads keywords and costs.
This will automatically import Google Ads data into Analytics and create a rich post-click data in Analytics about how users treat your post-click landing page after they click the ad:

Make Sure Your Accounts Are Properly Linked
Google analytics is an essential tool when we consider it for digital marketing decision-making process.
Companies and marketers cannot afford to have impractical and misleading data. So, it’s really important to ascertain that both the accounts are properly synced and are sharing the desired data.
Once the accounts are synced all Google Ads cost data i.e clicks, impressions and cost-per-click data will be visible in Analytics account profile.
Google in its Analytics audit section offers different snippets checkers which you can use as per your requirements.
Import your Analytics Goals into Ads
Every online business either profit or nonprofit must have some goals. That’s why they exist and spend a huge amount of money on maintaining their sites and advertising. Defining goals is a part of a strategic plan which aligns with your company’s mission.
The process of optimizing your ad campaigns starts with setting up goals in Analytics. Every online business must have some goals before they translate their efforts into dollar transactions. Once the syncing process is finished, you can easily import your Analytics goals and ecommerce transactions into Ads conversion tracking.
Setting up Goals in Analytics
Goal setting helps Google Analytics map the data. It helps understand key performing indicators (KPIs) which are used to measure micro and macro conversions.
Micro conversions are small relationship building activities which marketers perform to achieve macro conversions which are selling your product or service. Hence, your mission (macro conversion) should connect with small goals which are your micro conversions.
Google Analytics cannot tell you on its own how your business is performing. Once you define the final outcomes in the form of goals only then Analytics can help you understand the user behavior and path they take to reach your goals.
For a successful marketing strategy, marketers need to set up goals and track them on a regular basis.
To set up goals

Goals help you reach your destination. If you already have goals in your Google Analytics account. You can import them into Google Ads.
Google Analytics lets you set up goals on the view level, which means you can set up goals for each view. There are four types of goals. All these goals are a little different from each other but they perform the same action i.e. tracking conversions.
Once you click +NEW GOAL Analytics provides a set of different options depending on your requirements. You can either select pre-given options or go with a custom option.
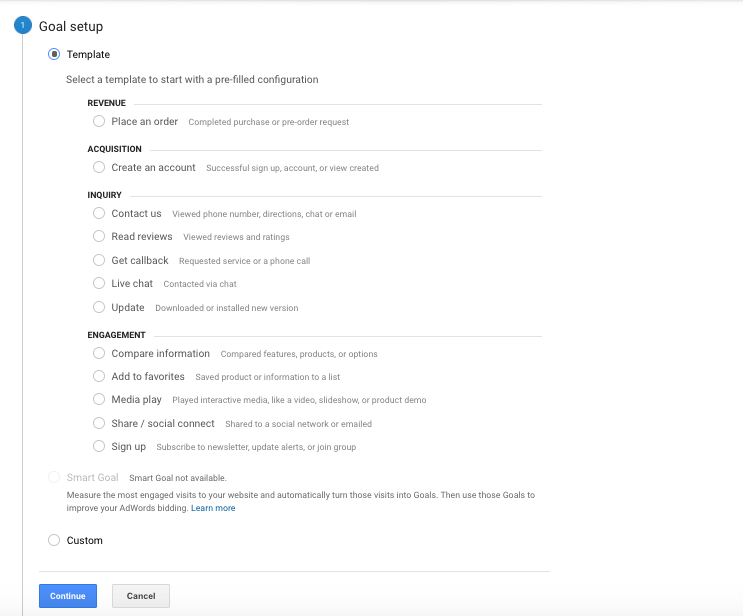
Before we proceed further let’s look at the different types of goals in Google Analytics.
Destination goal
A destination specified goal is triggered when a user lands on a specific post-click landing page and completes the desired goal. The goal could be anything, for example, offering a free webinar in exchange for a user’s personal information and finally redirecting them to a ‘THANK YOU PAGE’ is an example of a destination goal.
When setting up destination URL in Google Analytics, you have three different options in destination goal drop down menu:
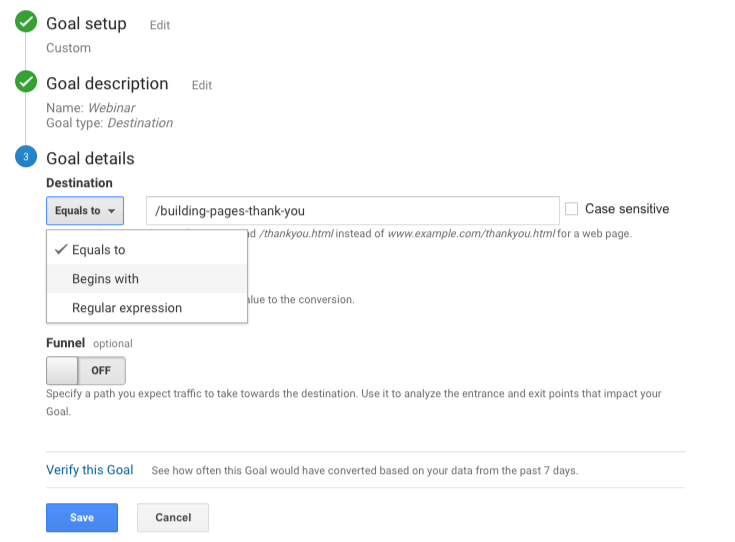
Let’s look at an example of a webinar post-click landing page URL. If you sign up for the Instapage webinar, it takes you a unique post-click landing page. The URL for the page is this unique page.
“https://instapage.com/webinars/building-pages”
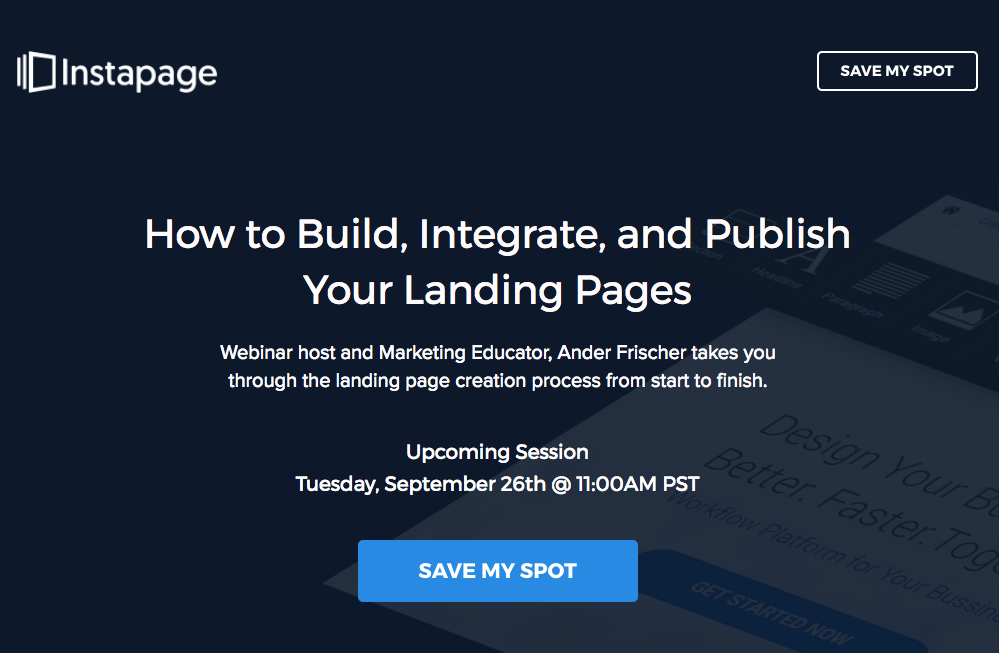
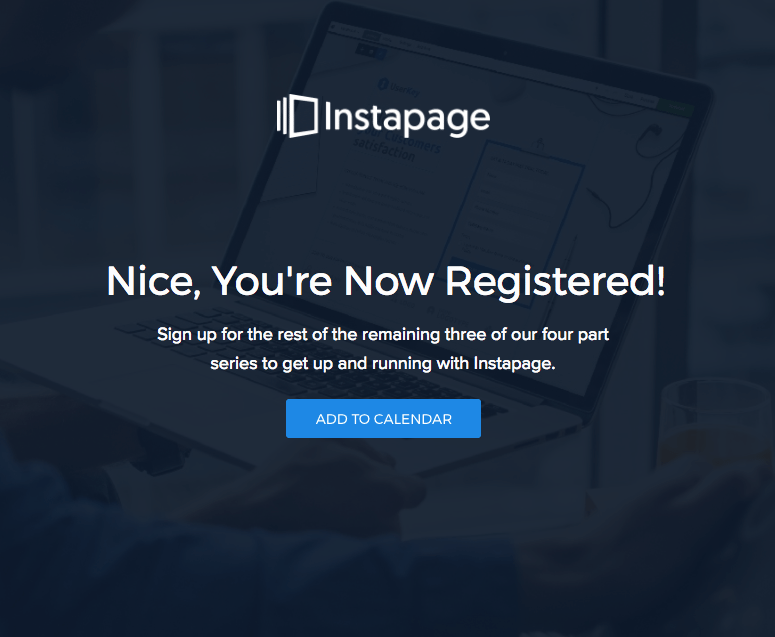
But as soon as you click the call to action button which is “SAVE MY SPOT”. It takes you to another ‘THANK YOU’ page URL.
“https://instapage.com/webinars/building-pages-thank-you”
When you select destination as a goal type you specify the goal page, not the entire URL. In the above case, the last part of the URL “/building-pages-thank-you” informs Analytics that somebody signed up for a particular webinar.
For more examples you can go through this resources article on Google.
Event goal
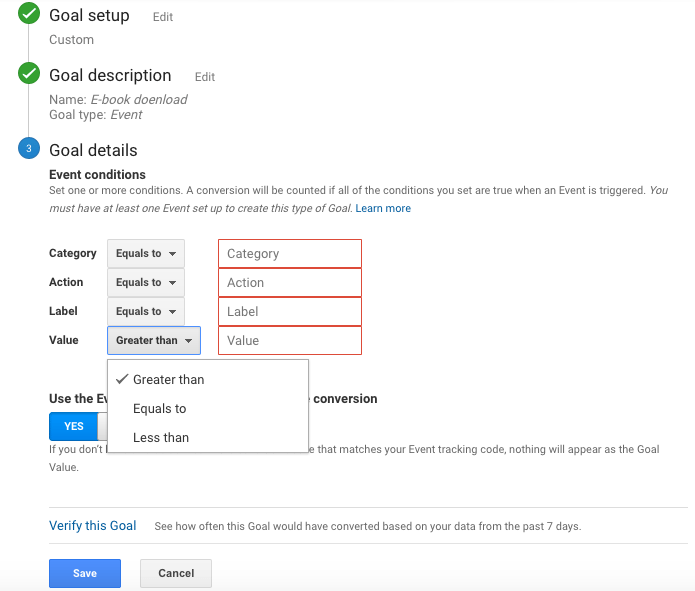
An event is an interaction or an activity of a user on your post-click landing page. For example, If, you have a lead gen post-click landing page which offers prospects an ebook or a whitepaper, downloading is an event taking place on your post-click landing page. Hence you need to set up an event tracking goal to count this.
Whenever someone enters an email address to download your ebook an event is counted in your analytics.
When setting up event tracking in Google Analytics you have four conditions to fulfill, otherwise the goal will not trigger in Analytics account.
2. Action: An action is the desired goal which you want prospects to take on your post-click landing page. In this particular case, the desired action would be ‘download’.
3. Label: Labels provide additional information to Analytics. Looking at the example above there is a possibility there are other ebooks you are offering to another audience segment. Giving a unique name to each ebook will help Google Analytics understand how many times a particular ebook was downloaded.
4. Value: Value interprets as a number. It could be time or a dollar value attributed to your potential prospect. You can use the time when you want users to watch a particular demo or product video. In our particular case if we give $3 value to our lead and 5 prospects download the ebook then the value you see in Analytics will be $15.
Pages/visit goals:
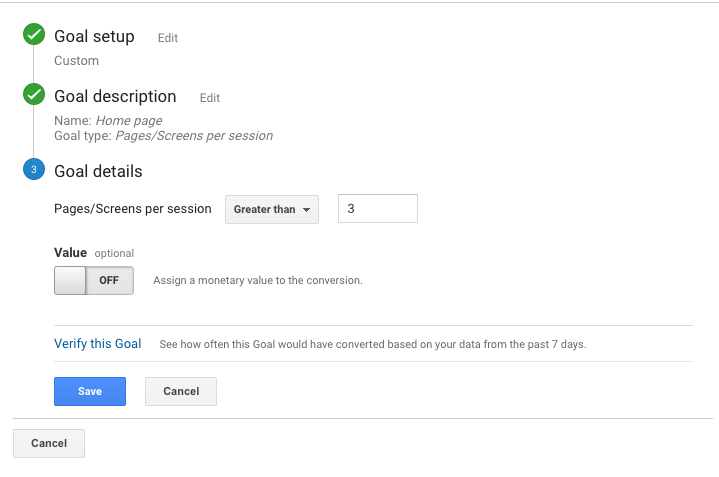
This goal is more likely to work for your homepage rather than a post-click landing page. The purpose of this goal is to track the number of web pages each visitor sees before they leave. This helps you determine the level of engagement of your content during a single session.
This could help you create a micro-conversion. Suppose if someone lands on your website homepage and visits the about us, blog and feature pages they may fulfill a pre-set micro-conversion goal. These are the visitors who are familiar with your brand and you can target them with remarketing campaigns
and send them to a dedicated post-click landing page.
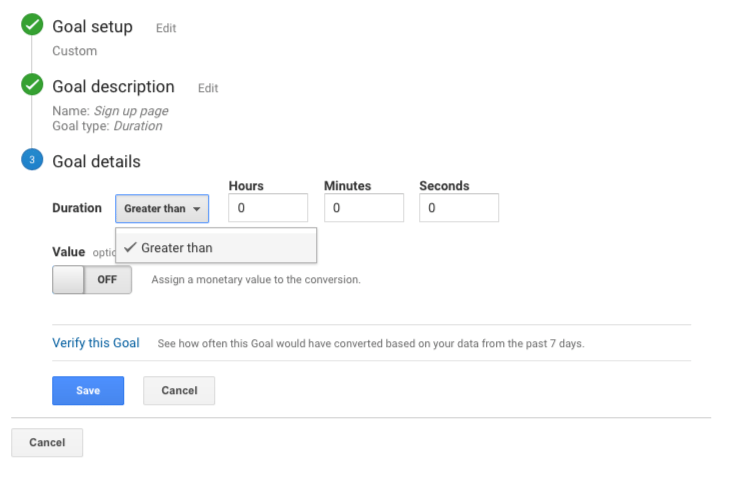
To set up this goal you have one option “Greater Than”. So as discussed above if someone visits your homepage, about us, blog and feature pages you can select these three as your threshold.
Time goal
Visit duration tells you how much time users spend on a post-click landing page. Time goal only triggers when a user exceeds the time you specify in your Analytics goals setting, this helps you measure the level of engagement the average user has on your post-click landing page.
This will help you understand the average time a user is spending to convert on your specific goal.
Import Analytics Goals into Google Ads
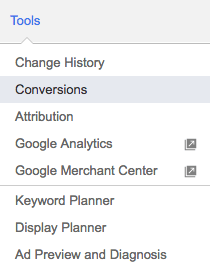
We have discussed in detail how to set up goals in Analytics. Once you have defined what your business goals are you do not have to make new goals for your AdWords account.
Simply import all your goals into Google Ads account.
Benefits of linking Your Google Analytics with Ads Account
After linking your Google Analytics with Google Ads account you can see ads and post-click landing page performance data in your Analytics reporting section.
Google Ads reports help you find customers. The reports help you find keywords and keyword groups for ad campaigns which can bring traffic to your post-click landing pages. Data in Google Ads tell you about ad spend and performance in other words how much have you spent on an ad and what you got out of it?
For example, you can find out which ad group produced more clicks or views and which one converted more.
However, what it does not tell you is user behavior – what users did once they landed on your post-click landing page. What actions did they perform before they converted?
For example, if a user clicks your ad and comes to the post-click landing page but doesn’t complete the desired goal, metrics like bounce rate may help you understand that this could be because of an ad and post-click landing page mismatch.
By linking Analytics and Google Ads, you can see the full picture, from the ad click all the way through to your conversion goal.
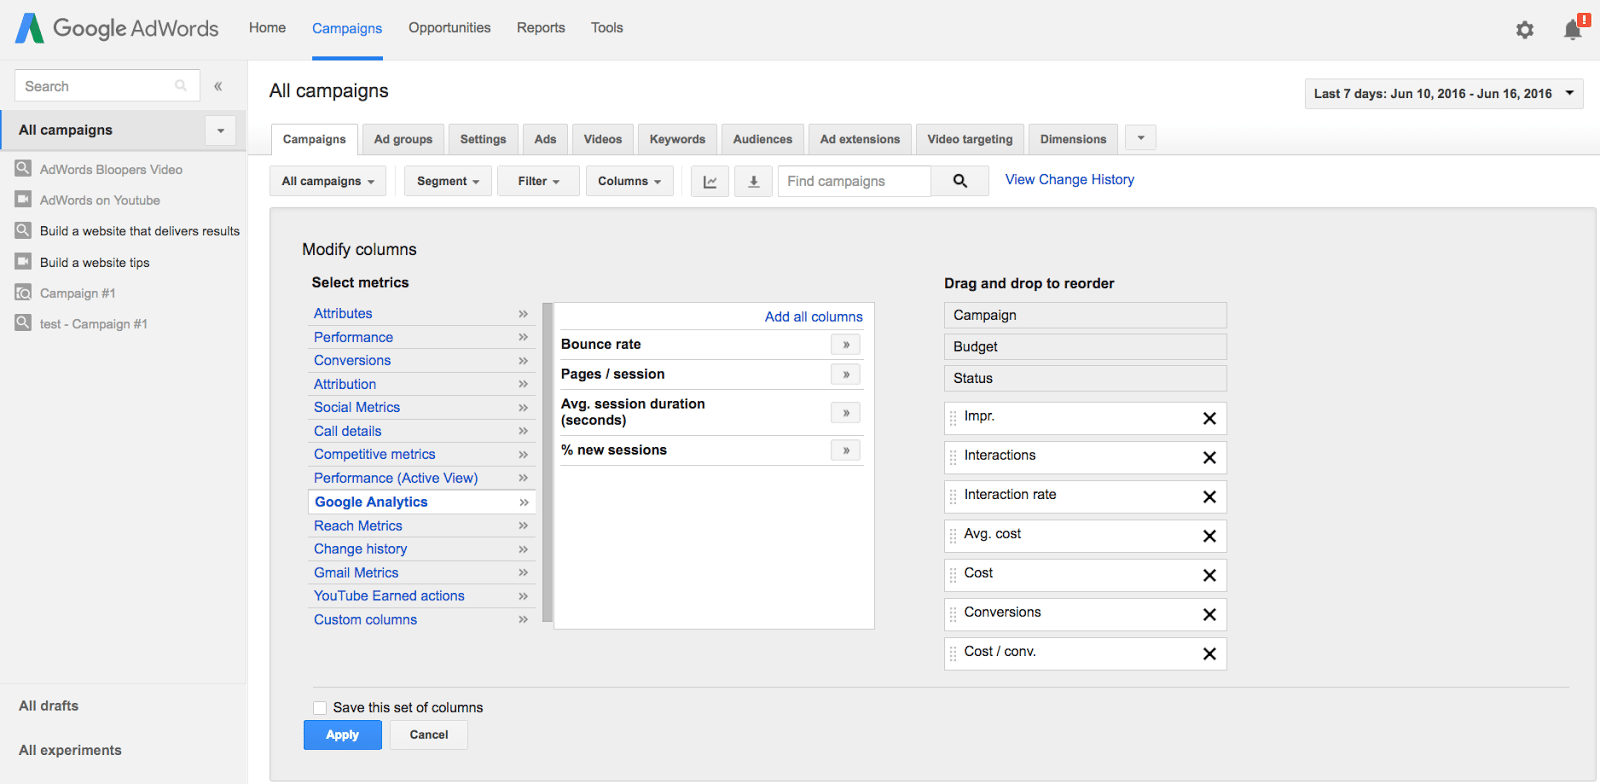
With Google Analytics’ Google Ads report you can compare on-site campaign metrics such as bounce rate, pages per session, average session duration and the percentage of new visitors for each of your Ads campaigns.
These metrics help you understand if your post-click landing page is getting the right traffic.
Some important Ads Reports include:
How can you read Google Ads reports in Google Analytics?
When Google Ads is synced with Analytics it forms a unique reporting system. The metrics in Google Ads and Analytics provide you with an in-depth acccount of how your different campaigns are performing. Hence, It’s essential for you to understand how a synced Analytics and Google Ads reporting system works.
These Google Ads reports provide you with post-click performance metrics about users who clicked your ad and landed on your post-click landing page, helping you understand Acquisition-Behavior-Conversion (ABC) cycle.
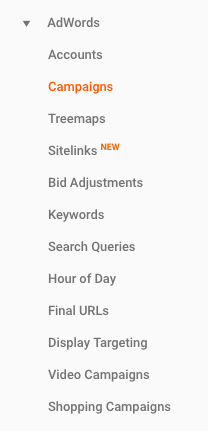
To look at Google Ads reports in Analytics go to Acquisitions > Google Ads and you can see the different Google Ads reports in your Analytics account. Let’s discuss each report in detail.
1. Account
The purpose of this report is to show the performance of different Google Ads accounts linked to your Analytics property. Account reports can show various Return On Ad Spend (ROAS) and Revenue per Click (RPC) between different accounts.

2. Google Ads Campaigns
With the help of Campaign report you can quickly identify how your campaigns, ad groups and keywords are performing. Metrics like acquisition behavior and conversion help you analyze the overall campaign performance.

3. Treemaps report
Treemaps report is a visual representation of different trends of traffic acquisition. The report gives you a quick visual representation where you are getting most of your traffic. For example, if you are running paid campaigns you can instantly notice whether you are getting more clicks from social or search ads.
The report represents data in different rectangles. The size and color of each rectangle represents different metrics:
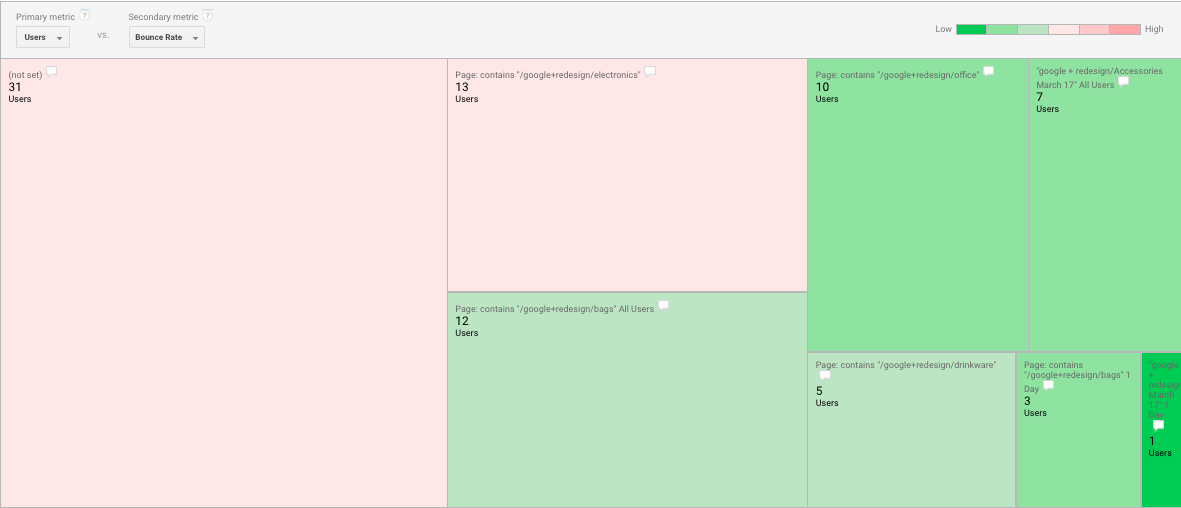
All the chunks of the report are in a rectangular form, the larger the rectangle the bigger the chunk.
All the reports are organized into primary and secondary groups:
As discussed above, colors are relative so the spectrum moves from red to green. For example, if the bounce rate is high, the report will show it in a dark red color (negative) and for low bounce rate it will show up in green color (positive). There is no absolute or fixed values associated with any specific color.
Each rectangle in the report could be an Account, Campaign, Ad Group or Query. They are hierarchy based, once you click on a rectangle it moves you down to the next level in the hierarchy.
4. Google Ads keywords:
This report is similar to the campaign report but in this case, the primary metric is the keywords. This report shows you a list of all the keywords linked with one account. This will help you identify the good and bad performing keywords

For example, if a keyword is drawing a lot of traffic per session in a number of sessions you can increase the sessions and attract more traffic to your post-click landing page. So, the basic purpose of this report is to help to identify the performance of different keywords.
5. Google Ads search queries:
This report helps you understand which search queries made your ad display. This helps you understand what users type in their search engines when they are looking for products or services similar to yours. It gives you an opportunity to refine your keywords list and help reach the target audience effectively.
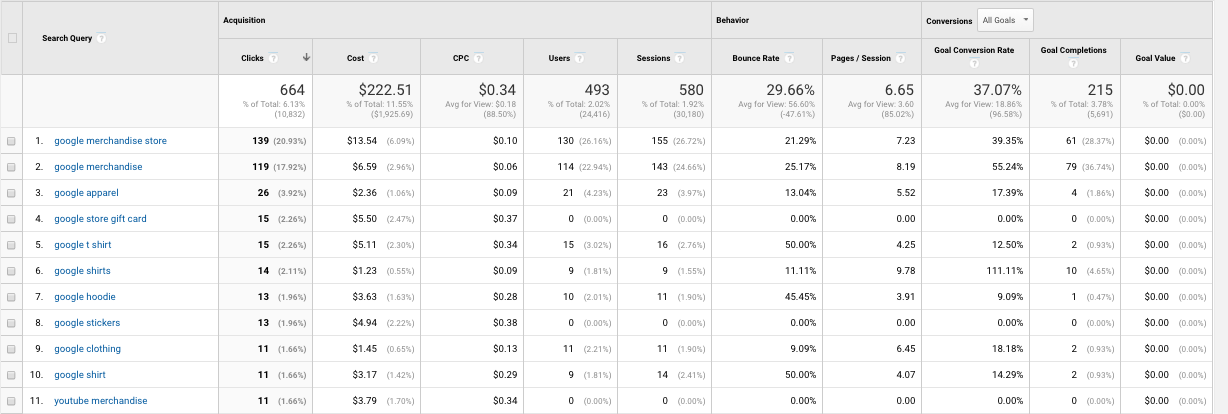
In the same report if you select ‘keywords’ as a secondary dimension it will show you a list of keywords in your account which matches with the variety of search queries. In this way you can analyze which specific keywords are responsible for direct revenue.
6. Google Ads hour of day:
This report helps you explore hour-of-day and day-of-week dimensions. The report helps optimize ad scheduling for each campaign on the basis of hour-of-day.

If you have already setup your goals, then this report can provide you with a more granular insight at what time of the day users are fulfilling your desired goals. For example in the screenshot above most users land on this particular post-click landing page during 5 AM to 7 PM.
7. Google Ads final URLs
Google Ads final URLs or Destination URL report lets you see the list of URLs from where your Google Ads are bringing traffic to your post-click landing page. With the help of this report, you can see which URLs are specifically sending more traffic.

Another benefit of looking at this report comes when you view the report by Ad Distribution Network and see which network (Search or Display Network) is sending more relevant traffic to your page.
Increase your bid on that network and attract more visitors.
8. Google Ads Display targeting
This report helps you understand the performance of your Google Ads campaigns which target the Google Display Network (GDN) ads. It includes reports from both Display Network and Search Network with Display select.
This report provides you with a variety of dimensions like; Display keywords, Placements, Topics, Interests and Remarketing, Age, Gender.
9. Google Ads bid adjustments:
Bid adjustment is a way to increase or decrease your bids to gain more control of your ad dollars. The method decides when and where your ads should appear in a specific situation.
For example, for a restaurant, people living in a 5-mile radius are more likely to visit than those who live further away, hence, their clicks are worth more for the restaurant owner.
Google Ads bid adjustment gives you control on selecting device, location, ad scheduling, top content, targeting methods, Remarketing lists for search ads and interactions.
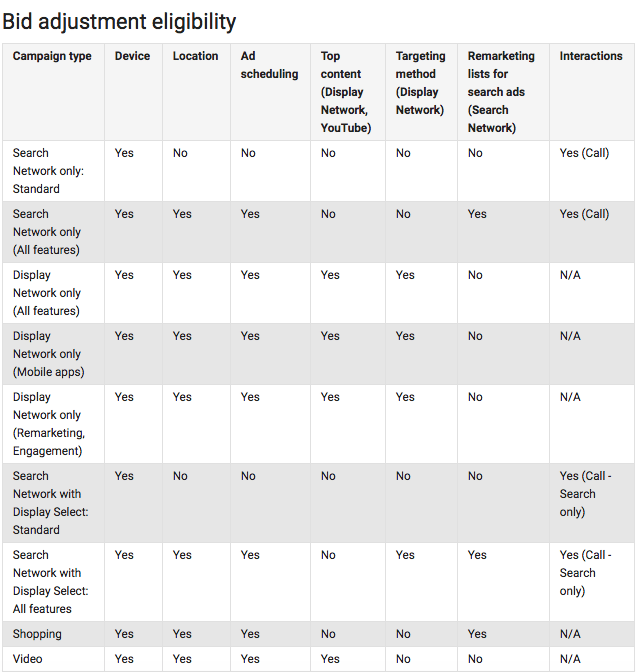
Above you can see the complete list of available options for Google Ads bid adjustments.
10. Google Ads video campaigns
Google Ads video campaigns provide insights on the performance of ads on YouTube and across other web partners. In Google Ads you can create compelling TrueView video ads campaigns by using different video ad formats.
These formats include;
Your video campaign report depends on your goals. In the Google Ads, video campaigns select the metrics group which aligns with your desired goals and see the performance of your Google Ads video campaigns.
For example, if the main goal of your video campaign is to direct users to your lead capture post-click landing page then your metrics could be session, paid views, cost-per-visit, earned subscriber, impression, cost-per-visit, signup completion goal, and engagement rate.
By default, this report shows campaign as a primary dimension so you can switch between ad content and video to video data to further segment your data.
11. Google Ads shopping campaigns
Google Ads shopping campaigns are designed for retail merchants. They are different than text ads as they feature the product’s photo, title, price, business name, and more. To read campaign reports Google recommends that both Google Ads and Analytics accounts should sync and auto-tagging should be enabled.
Once it’s done, you need a Google Merchant Centre account to set up your shopping campaigns.
With the help of shopping campaign report, you can analyze which shopping campaigns are more successful than others. Metrics like click-through-rate and conversion rate can easily separate winners from losers.
12. Google Ads sitelinks
Google Ads sitelink is a feature in Ads account which lets you add additional links to your ad other than your custom post-click landing page URL. Sitelinks help users understand your product. For example, if you add your privacy policy link in your site links, it can help users better understand your brand.
Other than that you can add your product features, pricing, ebook download post-click landing page links to your ad and analyze which post-click landing page as a sitelink is performing well and producing more user engagement.
Google Analytics reports to gain insights into paid opportunities
Google analytics reports help you understand user behavior in connection with your PPC ads and post-click landing pages. Mentioned below is a list of Analytics reports that help you gain an insight into how you should run your PPC campaigns.
Channel report
If you are just creating your Google Ads campaign and do not know where to start, the channel report under the Acquisition tab can change your wild guesses into data-based decisions.
This report helps you understand the key channels where you are already getting traffic:

Suppose your website is getting lots of traffic from organic search. It gives you an idea if the PPC campaign on search network ads will help you increase revenue.
In the same report, if you click the secondary dimension tab and click Source/Medium dimension, you can see which search engine either Google or Bing is more relevant to your paid advertising business.
Top conversion path report
Once you see which channel is responsible for more traffic, it’s time to see what the top conversion paths are. This report can show you what the top popular referral paths are and how many times users interact with each channel before they convert.
The report makes the complex conversion process really simple and agency managers can show the real conversion paths to their clients with a few clicks.
This is how the report looks in Analytics:

Now scroll up and select which conversion path you want to track, and click “Conversion Type Selected”:
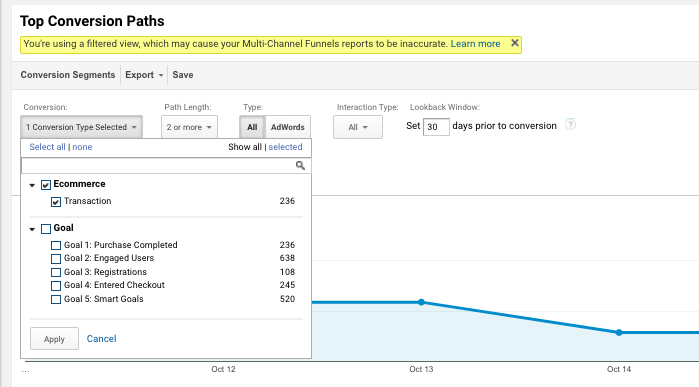
If your goal is to track an ecommerce transaction uncheck other goals. But, if your goal is to track the lead generation for your post-click landing page then check that particular goal.
To get a clearer picture of top conversion report click on “Source/Medium Path” tab and you can see the more enhanced version of the report, where you can see the names of all sources.
This is how the report looks like:

Time lag report
Once you know how users are reaching post-click landing pages by clicking your ads, it’s time to understand how much time they need to convert? Once you understand how much time your potential customers take to convert you can understand the customer life cycle and embed customer journey mapping into your marketing strategy:
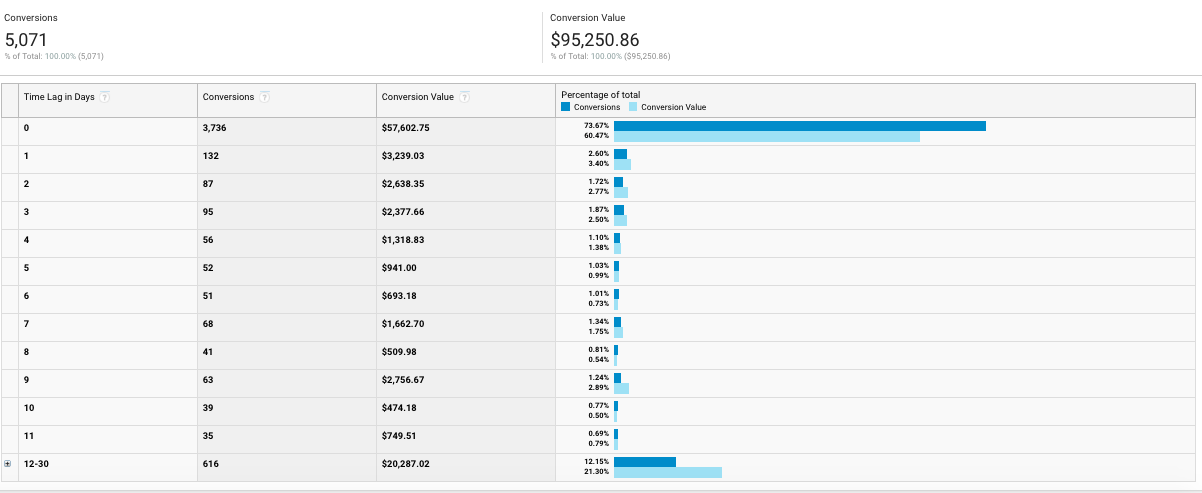
Google Analytics time lag report helps you understand the average time users take to convert after their first interaction with your brand.
So if you notice that your average visitor’s conversion path is 30 days long (after looking at the above report) after first interaction. Make sure your conversion history in AdWords is tracking 60 to 90 days of tracking data instead of the default 30 days.

Remember that you can track more than one type of conversion action. For example, from downloading ebook to purchasing your product you can review each conversion action independently in the time lag report. You can also link your conversion with your pre-defined goals.
Path length report
The path length report divides your conversion path on the basis of touchpoints. It tells at which point most of your users convert during their customer journey.
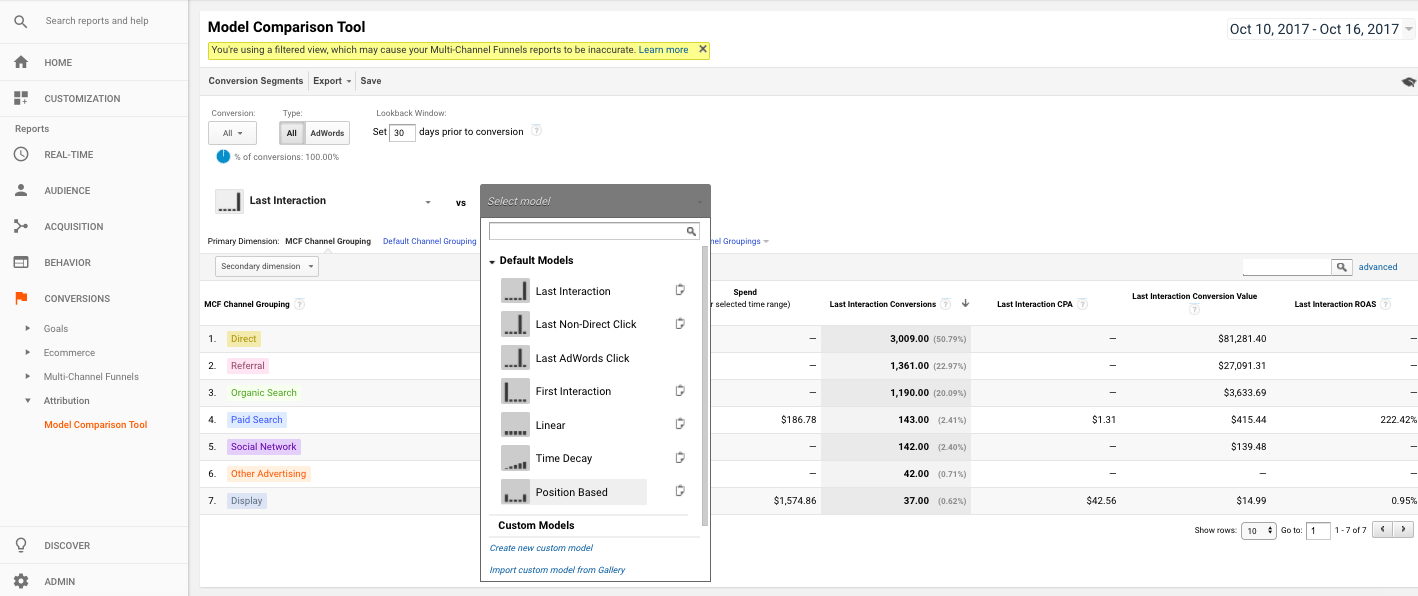
Path length reports can help marketers affect PPC performance. They can modify AdWords campaigns bids on engagement level with your brand. For example, if you find that it takes users at least three sessions before they decide to make a purchase. You can increase the bids for users who have visited your website two times but are yet to make a purchase.
When you notice that a certain touchpoint is attracting more visitors then you should use Position-based attribution model rather than the default last click model. This model will give more credits to different interactions during the customer journey and provide context to your PPC campaigns.
Assisted conversion report
Assisted conversions refer to a number of interactions a user has with a website or post-click landing page before the final conversion takes place. Assisted conversion is not considered as a final interaction yet assigns attribution value depending upon their contribution in the conversion path.

The most import tab in the above report is “Assisted/ Last or Direct Conversion” ratio tab.
In the screenshot, although the display advertising assisted conversions is only 11, but it played a significant role in the overall conversion pathway and the assisted conversion value is 5.50.
Google Ads allows you to promote your offers to your target audience via search and display ads on a medium that your visitors are bound to use.
By choosing the right keywords, creating optimized ads and connected them to dedicated and relevant post-click landing pages you ensure that your product/service gets the promotion strategy it deserves.
Connecting your Google Ads account with Google Analytics enables you to gain more insights into user behavior, helping you make informed paid marketing decisions.
With the number of Facebook’s monthly active users increasing, and the social network’s ability to target your customers based on a myriad of variables, running paid campaigns on Facebook seems like an obvious choice for most marketers.
Facebook has the biggest user base out of all the social media networks:

This means the ads you launch on Facebook have a much higher chance of getting viewed by your target audience. And, because Facebook collects a lot of user data (such as age, location, and interests) you can create ads and post-click landing pages that are perfectly tailored to your target audience.
To begin running your Facebook advertising campaigns, there are a few things you need:
Setting up a PPC Campaign in Facebook
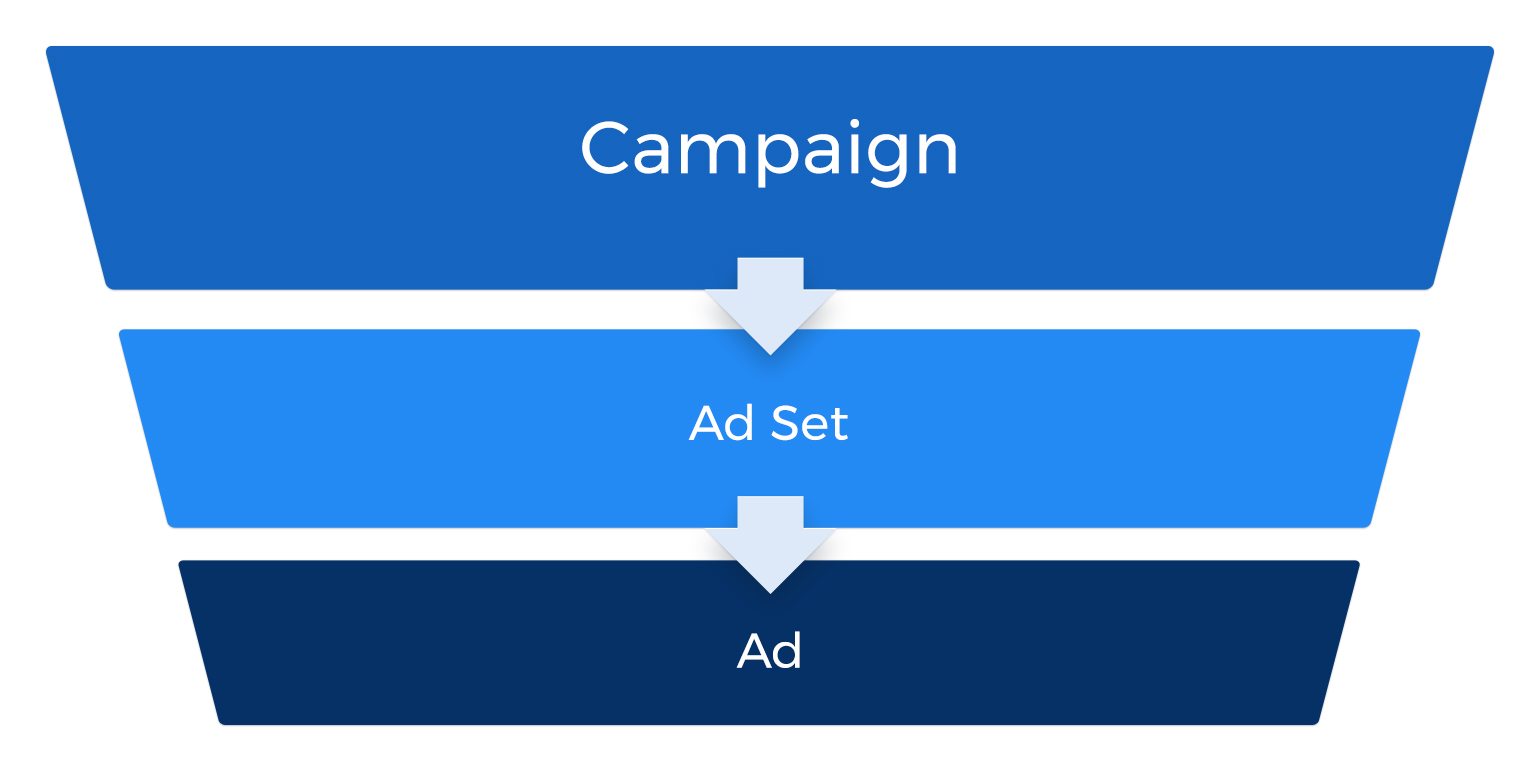
Facebook’s advertising campaigns are three tiered and have the following structure:
1. Campaign: A campaign can have several ad sets and always has a unique campaign objective. If you have multiple campaign objectives, such as increasing attendees for a webinar, and getting more downloads for an ebook, it would be best to run two separate Facebook campaigns. One campaign should have one objective.
2. Ad set: An ad set can include multiple ads and has a unique audience targeting, budget, schedule, and ad placements. You can use an ad set for Facebook A/B testing.
3. Ad: The ad is the smallest unit of the campaign. Ads have separate URLs, image, and copy.
This section of the chapter will focus on the step-by-step procedure you need to follow to create and optimize paid advertising campaigns on Facebook.
Here’s an overview of the steps involved in launching your Facebook ad campaign:

Step 1: Select campaign objective for Facebook Ads
When you set goals for your Facebook Ads, you’re essentially thinking about why you’re creating ads in the first place i.e. what are you trying to achieve with your ads?
Setting goals before your ads go live helps measure their success. For example, if the goal of your Facebook ad campaign is to increase sign-ups for your free trial, you can set the goal of 100 sign-ups for the first month. Having a concrete goal makes measuring success extremely simple.
The following is the complete list of Facebook campaign objectives available in the Ads Manager:
Facebook allows you to approach your campaign objectives in various ways.
To offer a simpler approach Facebook has categorized business objectives into the following three categories:

1. Awareness
The purpose of running awareness campaigns is to generate interest in a particular offer, or your product/service in general. You can reach your target audience in the awareness stage with the help of:
2. Consideration
If your target audience is already aware of what your business does, you can select Consideration as your marketing objective. The objective helps target audience consider your brand as a possible solution to their problem, and persuade them to learn more information about it.
You can use the Consideration objective to:
3. Conversion
The Conversion objective includes objectives that encourage people interested in your products/service to purchase or use your product, with the help of ads. Make use of the Conversion marketing objective to:
When you set your campaign objective you’re essentially helping Facebook determine the campaign’s ad formats and bidding options. The social network auto-optimizes your campaigns based on the campaign objective you choose.
Step 2: Assign a name to your ad campaign
After selecting the campaign objective Facebook asks you to name the campaign:

If you’re running multiple campaigns on Facebook, adding a date next to your campaign name can help you navigate between different campaigns.
Step 3: Set up audience targeting
If you’ve run previous Facebook ad campaigns, you have the option of using a saved audience. If this is your first Facebook Ad campaign you can simply create a new Facebook target audience.

Facebook also gives you the option of targeting ads at Custom Audiences – people who already know your business. You can create a Custom Audience to show ads to users who are already in your contacts, which includes your website visitors or current app users.
You can customize your audience based on:
You can also choose the option of detailed targeting, this allows you to refine the group of people who see your ads. You can add additional demographic information, interests, and behaviors.
The detail targeting options can be based on:
You can get even more laser focused with your targeting options by adding criteria to the ‘Include people’ and ‘Exclude people’ option.
After you’ve selected the criteria, Facebook will automatically include or exclude people who meet at least one of the added criteria.
For example, let’s say you’re promoting an app that features high-protein recipes, and you add the following criteria to the ‘Include people’ option:
A user who follows fitness pages, but doesn’t follow workout pages, will be included in your audience and will get to see your ad.
If you want to include or exclude people who meet all of your criteria, you can use the audience narrowing actions. This is how it works, using the example we used above:
While narrowing your audience, be careful not to make it too specific, as doing that can lead to an audience that’s too small to be effective. Facebook automatically optimizes the target audience you create, so you don’t have worry too much about refining your audience further.
Step 4: Set ad placement
Where your ad appears on Facebook is called the ad placement:

Facebook ads can appear as sponsored posts interspersed between regular posts, they also appear on the right-side column across Facebook.
Facebook ads can also appear in Instant Articles within the Facebook mobile app and Messenger, another ad placement is in-stream videos when your ads appear as short videos in both Live Video and Video on Demand.
The campaign objective you selected in step 1 determines which ad placements are available to you:
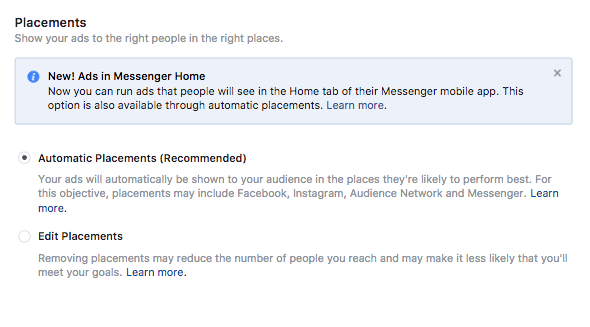
Facebook pre-selects and recommends using the ‘Automatic Placement’ option. When you choose the automatic ad placement option Facebook shows your ads in the placements they’re likely to perform best for your selected audience. Automatic Facebook ad placements may include Facebook, Instagram, Audience Network and Messenger.
The following chart identifies the ad placements that are available to you for each marketing objective:

Facebook’s newest ad placement ‘Ads in Messenger Home’ allows you to run ads that people will see in the Home tab of their Messenger mobile app.
You can also select the ‘Edit Placements’ option and remove ad placements you don’t prefer, though this may reduce the number of people you reach and so may make it less likely to meet your marketing goals.
Step 5: Selecting Budget & Schedule
As the title suggests this step involves the selection of budget, schedule of your ads, optimization for ad delivery, bid amount, and ad delivery type:

Budget
Your budget is the amount of money you’re willing to pay to run your ads. Budgets are a cost control tool, as they help control your overall spending for an ad set in the same way bids help control your cost per result.
One thing to remember is that when you’re setting a budget you’re not buying ads or the ability to show ads to your target audience. You’re just letting Facebook know how much you’re willing to spend on ads. The budget you select is different from your amount spent.
Also, each ad set has a separate budget, you should know this if you have more than one active ad set.
There are two options available in terms of budget selection:
Daily Budgets: The daily budget is the average amount you’re willing to spend on an ad set per day. Because the amount you’re setting is an average amount, the amount actually spent daily may vary for different days depending on ad opportunities Facebook sees for better results. For example, if you set a daily budget of $20, somedays Facebook may spend $13, and somedays it may spend $9 – depending on ad opportunities. Facebook spends more of your daily budget on a day with more opportunities for results and less on a day there are fewer opportunities.
Lifetime Budgets: The lifetime budget is the amount you’re willing to spend over the entire duration of the runtime of your ad set. If you select the ‘Standard Delivery’ option, Facebook spends the lifetime budget evenly over the runtime of your ad set. Similar to daily budgets, Facebook chooses to spend varying amounts on different days depending on ad opportunities it finds. However, if you select the ‘Accelerated Delivery’ option and ‘Lifetime Budget’, the budget could all be spent in less than a day.
Once you’ve chosen your budget, don’t change it too frequently as doing this may affect your ad performance. This happens because Facebook has to re-learn how to best deliver your ads so you get the most out of your newly selected budget.
Schedule
The Schedule determines whether your ad set will run continuously from a particular date you select, or within a selected date range. If you’ve selected a lifetime budget, your ad set must have an end date. Doing this allows Facebook to spend the selected budget, and pace the ad set delivery evenly across the ad set’s lifetime.
On the other hand, if you’ve selected a daily budget, you don’t have to set an end date, and Facebook will keep delivering your ad set until you pause your campaign or reach your account spending limit.
Optimization for ad delivery
The optimization for ad delivery option allows you to choose how you want Facebook to target your audience based on what you’re trying to achieve. The option you select affects who sees your ads, to get you the best results at the lowest cost possible.
These are the options available:

For example, if you select the recommended option of ‘Link Clicks’, your ads are targeted to people who are most likely to click your ads.
Bids
You also need to select a bid amount at this step. The bid is the monetary value associated with each ad set, the amount represents how much you’re willing to pay for the ‘Optimization for Ad Delivery’ option you chose.
Your bids are combined with two other factors – estimated action rates and ad quality and relevance. The three factors are entered into Facebook’s ad auctions, which ultimately determine which advertisers get to show ads.
So, the ad that wins the auction and gets shown is the one with the highest total value for the combination of the following three factors.
1. Advertiser bid: When you select the manual bid amount, you enter a bid based on what results are worth to you – this depends on the optimization for ad delivery selected. Essentially, you represent how much you value the result your ad set is optimized for through the bid. By selecting the automatic bidding option, you allow Facebook to do this for you. It is recommended to bid your true value or higher for best results.
2. Estimated action rates: Every ad set is optimized for an action. Facebook estimates action rates based on how likely they think a given person is likely to take that action. The estimated action rate helps determine the difference between an ad being generally relevant to someone’s interests and it being likely to convince them to take the action you’re optimizing for. Facebook bases estimates on the past actions of your target audience, and your ad’s historical performance data.
3. Ad quality and relevance: Facebook calculates ad quality and relevance based on how interested your target audience will be in seeing your ad in terms of its overall quality and specific relevance. An ad that has received lots of negative feedback will decrease its total value. Whereas, if the target audience is interested in the ad it will increase your ad’s total value. Check your ad’s relevance score to see how audiences are reacting to your ad. The relevance score, is a number between 1 and 10, and the positive and negative feedback of an ad will be shown as a rating of low, medium and high:

The relevance score, is a relative number, which means that the value only measures how relevant your ad is compared to other ads targeting the same audience.
When determining the winner of an ad auction, Facebook standardizes the advertiser bid, estimated action rates, and ad quality and relevance to account for different optimization goals, they then combine them into a total value. The ad with the highest total value wins and gets shown to audiences.
There are two bidding options available:
Facebook recommends choosing the ‘Automatic’ bidding option.
The ‘When You Get Charged’ option determines when you pay for your ad. You can choose to pay whenever a user clicks the ad, or when a user clicks the ad’s video and watches up to a certain point.
The charge choice is different than the Optimization for Ad Delivery choice, the latter lets Facebook know which results you value (whether that’s clicks or impressions).
Facebook’s delivery system tries to show ads to the audience who are likely to get you those results. The optimization for ad delivery choice you use, in combination with your bid has a major effect on your average cost per result.
Ad Scheduling
Facebook allows you to schedule ads for specific hours and days of the week. You can choose to run ads all the time, or choose to run ads on a specific schedule.
One thing to consider in ad scheduling is rotating ads for audiences, so if they aren’t convinced with one ad, there is a chance they will be with another. You should also set a frequency cap so the same person doesn’t see identical ads multiple times, as this can cause banner blindness.
Delivery Type
The delivery type you choose determines how Facebook spends your budget. There are two options to choose from:
Step 6: Create your ad
In this step, you need to select your preferred Facebook ad format and insert the ad copy and images to create your Facebook ad.
You can create a new ad, or use an existing post:
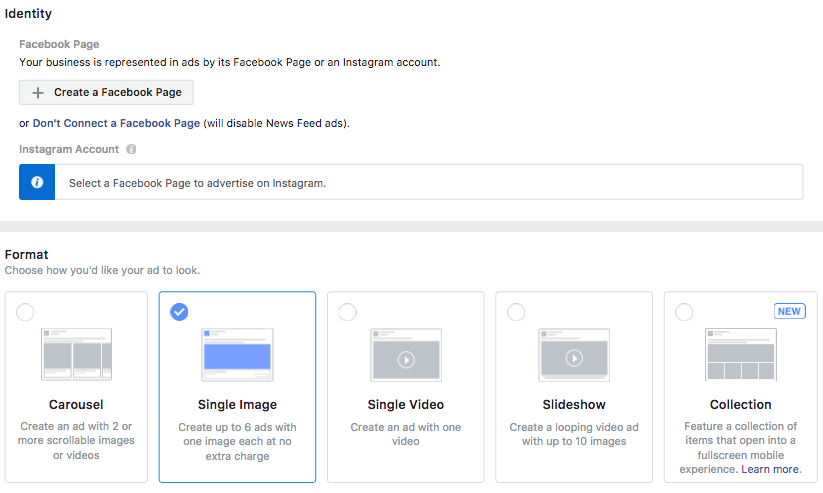
Ad formats
You can choose from the following ad formats:
Carousel: Create an ad with 2 or more scrollable images or video.
Single image: Create up to 6 ads with one image each at no extra charge.
Single video: Create an ad with one video.
Slideshow: Create a looping video ad with up to 10 images.
Collection: Feature a collection of items that open into a full screen mobile experience.
Add images
You can create 6 ads at once by uploading multiple images. Facebook recommends the following image specifications:
Facebook ads that contain images with little to no image text tend to cost less and reach more people than ads that use images with text. Here’s an example of preferred image text:

Destination
After the images have been uploaded, you need to select your ‘Destination’ – the page where a user will be directed to after they click your ad.
Always connect your Facebook ad to a relevant post-click landing page, as this results in a highly relevant experience for the visitor which increases the chances of conversions. The next section of the chapter will explain the importance of connecting Facebook ads with relevant, dedicated post-click landing pages.
Ad text
It’s now time to enter the text for your ad. Make your ad headline brief, so the target audience immediately knows what your ad is about. The character limit for the ad headline is 40, you can add more characters but your headline may cut off when audiences see your ad in certain ad placements.
Your ad text should clearly tell audiences what you’re promoting through the ad.
Call to Action
Selecting a Call to Action enables you to choose the action you want audiences to take when they see the ad.
These are the Call to Action options Facebook offers:
News feed link description
You can add a news feed link description in your ad, which is additional text to emphasize to audiences why they should click your ad. The newsfeed link description will not appear in all ad placements.
Use Conversion tracking to see ad performance
Conversion tracking allows you to measure the ROI of Facebook ads by reporting on the actions your target audience takes on the ad – the actions can range from page likes to app installs. The results of the conversion tracking are available in the Ads Manager, along with the ad performance data.
You have three options to select from for conversion tracking:
![]()
1. Facebook Pixel: The Facebook Pixel is an analytics tool that helps you measure the effectiveness of your advertising. The Facebook Pixel can be used to understand the actions visitors are taking on your website or post-click landing page and reach the audiences you care about. You can set up the Facebook Pixel by placing the pixel code on the header of your website. When a visitor takes an action, the pixel is triggered and reports an action. The Facebook Pixel is used for running remarketing campaigns in Facebook.
2. App Events: Adding app events allows you to add events to your product to view analytics, measure ad performance, and build audiences for ad targeting.
3. Offline Events: Tracking offline events lets you upload offline sales and interaction data to measure ad conversions. You can then build audiences for ad targeting based on those transactions.
In addition to keeping tabs on conversion tracking, you can also use Facebook dynamic ads that present you with the opportunity of getting more ad clicks.
Facebook recently launched dynamic ads, the ads give marketers the opportunity to add image and text variations and let Facebook deliver the winning variation to audiences.
Facebook dynamic ads
Facebook has recently launched Dynamic Creative Ads which are operated through the Dynamic Creative.
According to a new release from Facebook, the Dynamic creative is a tool in Power Editor and the updated Ads Manager that automatically delivers the best combinations of your creative assets. It finds the best ad creative combinations by taking the components of the ad (images, videos, titles, descriptions, CTAs, etc.) and running different combinations of these assets across audiences.
The Dynamic Creative takes the basic component of an ad and automatically explores a series of ad variants based on the ad components. To create Facebook dynamic ads, you must provide an assortment of images, videos, descriptions and other creative assets.
You can upload the following number of creative assets for dynamic ads:
Facebook then delivers different combinations of the creative assets to your target audience to see which combination performs best for which ad placement and audience:

Facebook then reports back to you with the results of the test:

The whole process will save you time because, with Facebook Dynamic Creative, you won’t have to build any of the ads yourself, but instead simply upload your creative assets and let the social network’s technology do the rest.
Facebook Dynamic ads currently only support single image and single video format.
Supported ad placements for dynamic ads include:
Now that you know how to optimize the campaign set up process, and create dynamic ads it’s time to optimize the Facebook advertising component that your target audience will be seeing i.e. the Facebook ad.
Optimizing your Facebook ad
Your Facebook ad is basically made up of four components – headline, copy, image/video and CTA button. To ensure that your target audience responds favorably to the ad, here’s how you should optimize the ad components.
Write an attention-grabbing headline
Your ad is going to be competing with other ads on Facebook. To ensure your ad gets clicked what you need among other things is a headline that has the power to capture your target audience’s attention.
The ad headline should showcase what your offer or product/service is about, in a way that makes them want to find out more and click the ad.
Compass’ Facebook ad headline tells the user what the service can do for them:

This is not what you should be doing with the ad headline:

The headline is incomplete, and though it started off as interesting, it ends with leaving a question mark in the user’s mind, because it makes no sense. This is what the complete headline looks like:

The copy talks about unfinished sales pages, but the ad itself appears to have an unfinished headline. Make sure you check how your headline appears in all ad placements.
Showcase your unique selling point in the ad copy
As you’re limited to a few characters, the ad copy should clearly let users know how your offer is going to help solve their problem and make their life easier.
Getapp’s Facebook ad copy does exactly that:

Include a relevant click-worthy CTA button
The primary job of a CTA button is to let visitors know what to expect after they’ve clicked an ad. The button should be relevant to the offer showcased in the ad, it’s also a good idea to use an action verb to motivate visitors to take an action.
This is what Racheal Cook’s Facebook CTA button does:

Add a relevant, and engaging image/video
The media you include in your Facebook ad whether that’s an image or a video should be relevant to the offer, along with being visually engaging.
Take the Fletcher Method’s ad image as an example:

The image features a template, which is what the offer is about.
In addition to optimizing your Facebook ad components, there’s one thing you should always do to increase the likelihood of getting conversions post-click – always connect your Facebook ad with a relevant, dedicated post-click landing page.
Why you should connect Facebook ads with relevant post-click landing pages
Getting an ad-click isn’t the end goal of your advertising campaign, what you want is to take visitors to the real destination – a page with the full offer and the final CTA button.
When you put your homepage or product page as a real destination for the Facebook ad, you risk distracting visitors from the real offer.
For instance, when you click GiftWizard’s ad:

This is the page you’re directed to:

This is not a dedicated page, which means that it’s littered with navigation links and is not designed to get conversions.
Let’s now look at an ad that directs visitors to the real destination i.e. a dedicated post-click landing page.
This is the post-click landing page visitors are directed to after they click the Facebook ad:


The page is dedicated to the offer presented in the ad. All the components on the page center around the offer, ensuring that the visitor has all the information, so they can click the CTA button.
When you launch PPC campaigns on Facebook you have at your disposal one of the biggest pools of social audiences, along with laser-focused targeting options, helping you achieve campaign goals and increasing ROI.
Instagram currently has over 700 million monthly active users. To put the number into perspective, the amount is more than double the monthly active users of Twitter, and three times more than the monthly active users on Facebook Messenger and WhatsApp.

Instagram ads launched in late 2015, the network has been growing steadily since then with 70.7% of US businesses using the network’s advertising capabilities to launch their marketing campaigns:
Instagram now has more than 1 million monthly advertisers and 8 million business profiles, making Instagram ads a viable avenue for businesses looking for customer engagement and business growth through PPC advertising.
Before we dive into the step-by-step process of creating and launching PPC marketing campaigns in Instagram, let’s do a quick recap of why Instagram ads are the right choice for your business.
Why you should invest in Instagram ads?
Listed below are just a few reasons why using Instagram ads for your PPC campaigns is the right choice:
Now that we’ve covered why you should use Instagram ads, let’s look at the way you can get started by creating and launching your Instagram ad.
Getting started with Instagram ads
There are five different ways to set up and manage Instagram ads:
This guide will only discuss the first two ways of creating and managing Instagram ads in detail, because they are most commonly used by businesses.
The Power Editor is Facebook’s advertising tool designed for larger advertisers who want to create, edit, and publish multiple ads at once. Through Facebook’s Marketing API you can build marketing automation with Facebook’s advertising platform, the app created is a container for any type of Facebook ads functionality.
Similar to the Power Editor, the Marketing API is mostly used by larger advertisers who have the development capabilities to manage multiple ads at once.
Managing ad campaigns with Instagram partners involves using experts who can help you unlock the platform’s potential for your business. Through this method you can find proven experts in everything, ranging from buying ads for Instagram, to sourcing and delivering ad creatives at scale.
The list of Instagram Partners is categorized into specialties including Ad Tech, Community Management, and Creative Platforms. Ad Espresso, Adobe, AdRoll, and Hootsuite are just some of the Instagram Partners available to businesses.
Creating Instagram ads with Facebook Ads Manager
Using Facebook Ads Manager to create Instagram ads allows you run a PPC campaign on Instagram, even without an Instagram account. If you don’t have an Instagram account, you can simply choose a Facebook page to be associated with your ad campaign. This Facebook page then represents your business for Instagram ads.
If you do have an Instagram account, you can connect the account when you are adding the ad itself.
These are the steps you need to follow to create Instagram ads with Facebook’s Ads Manager:
Marketers prefer to create Instagram ads through the Ads Manager rather than within the app itself because they can do much more with the Ads Manager. Creating Instagram ads is very similar to creating Facebook ads.
We discussed the process in detail in chapter 3. Go through the section to get a more in-depth look at every step.
Step 1: Choose a marketing objective
Facebook offers a total of 11 objectives in the Facebook Ads Manager:

However, only 8 are available for Instagram ads:
Step 2: Define your ad audience
Facebook empowers you with the ability to target a very specific set of people. You can create a precise audience pool by combining factors that make up your target audience:
1. Location: Enter global regions, local areas, countries, postal codes or addresses to include people who make up your target audience and exclude people who don’t.
2. Age: You can select a range of age – the widest set of age range is 13-65+.
3. Gender: Choose to show your ads to every gender, or just men or women depending on the product/service.
4. Languages: This option can be left blank, unless the target audience uses a language that’s not common in the locations you’ve selected.
5. Demographics: You can include or exclude people based on their employment, education, lifestyle, and household.
6. Interests: Target people based on their interests, their Facebook activities, the pages they liked, and interacted with etc.
7. Behaviors: Target people based on their buying intent, device usage, activities etc.
8. Connections: Target users who are connected with your pages or your app.
You can also target people through Custom Audience and Lookalike Audience.
Step 3: Choose ad placements
Facebook by default selects both Facebook and Instagram ad placements. If you only want to run your ads on Instagram you need to select ‘Edit Placements’ and deselect ‘Facebook’ from the placement options:

You can also use the advanced options to pick out the mobile devices and operating systems (iOS or Android) you want the ads to appear for. This is extremely helpful if you’re promoting a mobile app, because if you’re promoting an iOS app, selecting ‘iOS devices only’ can help narrow the audience pool.
Step 4: Set a budget and schedule
Setting a budget determines how much you want to spend on the ad, and how long you want the ads to run:

You can select a lifetime budget or a daily budget. The ad schedule determines if your ads will run continuously until you pause them or the lifetime budget runs out. You can also select a start date and an end date. How much your Instagram ad costs you is determined by you, you have the option to pause the campaign at any time and adjust the budget as you see fit.
Step 5: Create your ad
There are 6 ad formats you can choose from for your Instagram ads:

If you’re looking to create Instagram feed ads you can use the following formats:
You can also launch Instagram Stories ads, here are the two available formats:

After you’ve selected an ad format, you need to add a ‘Destination’, this is the page you want the visitor to be taken to after the ad click. You should always connect your Instagram ads with relevant post-click landing pages instead of a busy homepage or a cluttered product page, because post-click landing pages increase the probability of conversions.
We’ll discuss the importance of connecting your Instagram ads with post-click landing pages at the end of the chapter.
After the ‘Destination’ you should add a headline, ad text and a call to action button. The characters available for your headline and ad text vary depending on the ad format you’ve chosen.
Creating Instagram ads within the Instagram app
If you prefer not to use the Facebook Ads Manager, you can also create and manage your Instagram ad campaign from inside the social network’s app.
Before you can create ads, you need to do the following:
After you’ve completed the pre-requisites, these are steps you need to follow:
Step 1: Select the Instagram post you want to promote
Select the post you want to promote and then proceed to click on the blue ‘Promote’ button.
Step 2: Choose an objective
You only get to select from two objectives, instead of eight in the Facebook Ads Manager:
Step 3: Set your action button, audience, budget, and duration
Depending on the objective you’ve selected, you have different call to action buttons to choose from, such as Get Directions, Learn More, and Call Now. You can now select your audience i.e. who you want to target, your ad budget and duration.
You can target audience based on location, interests, age, and gender. You can allocate a total budget for your ad, and choose the number of days you want to run the ad:
Once you’re done with your selection, you can go ahead and promote your ad.
Now that we know how to create an Instagram ad, let’s look at the process of optimizing your Instagram ads to guarantee conversions.
How to optimize Instagram ads
Instagram users are increasing rapidly, which is good news for your business because this means more and more people from your target audience will get to see your ads. Sadly, not all ads can prompt a user to take action, this is why you don’t need to just create ads, but optimize them for the target audience.
Here’s what a typical Instagram ad looks like:

Instagram ads usually have three components – copy, image or video depending on the ad format and a call to action. Instagram is primarily an image centric platform – the main purpose of Instagram was for people to share their images, this is why it’s critical you choose the right visual assets for your ad.
Let’s have a breakdown of the optimized elements of an Instagram ad.
A visually appealing, relevant visual
Your Instagram visual shouldn’t only be able to grab visitors’ attention, but it needs to be relevant to the product/service you’re promoting. As the image makes up most of the ad, it needs to be able to tell a story itself, so you don’t have to use a lot of copy to explain what you can do for visitors.
Lushorganix’s Instagram ad’s image is a perfect example of a visually appealing image that’s relevant to the product and tells a story:

Just by looking at the image the visitor understands the product has to do with shiny, healthy hair.
Copy that piques user interest
Ad copy that piques visitor interest is what gets you the click. Your Instagram ad copy needs to explain clearly and succinctly what your service does.
Tawkify’s copy, that also serves as a headline explains what the service is about:

A call to action that is relevant and click-worthy
The call to action button of your Instagram ad needs to be relevant to the offer being promoted, so users know exactly what action they’ll be performing next – immediately making it click-worthy.
Yelp’s CTA button ‘download’ is relevant to the offer, the ad description talks about downloading the app for free, which corresponds with the button copy:

After you’ve optimized Instagram ads with the right components, the next step is to connect your ads with dedicated, relevant post-click landing pages.
In contrast to homepages and product pages, which highlight and promote multiple products/offers at once, post-click landing pages have only have to promote one offer – making it the center of attention, helping you achieve your conversion goal.
When a user clicks through your ad, they’ll have certain expectations for the post-click landing page. It’s your job to meet those expectations with something called message match.
When users land on a post-click landing page that has message match, they are more likely to convert because their expectations are met which increases credibility for your product or offer.
Your Instagram ad is promoting a specific offer, connecting it to a dedicated page that also promotes that offer makes perfect optimization sense.
Don’t make visitors go on a finding spree by sending them to a homepage or product page after they’ve clicked the ad, because chances are they won’t do the work to find what they were looking for after bypassing pesky navigation links.
Instead, make converting for the offer the easiest thing for them to do by diverting them to a post-click landing page where all the elements are created to promote a single offer.
Instagram is rapidly becoming one of the most popular avenues to run PPC campaigns, owing to its expanding user base and ample targeting options. Start creating optimized Instagram ads today to take advantage of the platform’s flourishing user base.
Google AdWords pretty much dominates the search and paid advertising channels, this is the reason why marketers often overlook Bing as a paid marketing option.
The truth is that Bing is a powerful network, with powerful benefits.
You can connect with your customers at any time and through any device, plus you have the ability to import campaigns from other networks, such as Google AdWords conveniently into your Bing dashboard.
Here’s a visual which sums up why you should consider running PPC campaigns in Bing:

Ignoring Bing Ads for paid campaigns means you’re ignoring a big chunk of advertising space, plus a chance to get more clicks with lower CPC.
For instance, WordStream reported that they experienced a 33.5% cheaper CPC when using Bing Ads, compared to Google AdWords. CJ Pony Parts, a service that sells Mustang parts reported that they gained 35% better CPC and ROI compared to Google AdWords.
In fact, when you choose to run paid campaigns in Bing rather than Google AdWords you get to enjoy the following benefits:
2. More control at campaign and ad group level: Bing allows you to assign different time zones to different campaigns, which makes ad scheduling easier to manage for campaigns with an international audience. Google AdWords lets you set network, location, scheduling, language, and ad rotation settings at the campaign level, Bing lets you access these settings at the ad group level. You can easily adjust a setting for an ad group without going through the hassle to create a new campaign to implement a change.
3. Better device targeting options: Bing gives you the option of excluding desktop and tablet traffic from your campaigns. You can even target mobile devices’ operating systems for your ads. Bing also allows advertisers to adjust your bid for tablet users.
4.More control over search partner targeting: Unlike Google AdWords that only allows advertisers to target Google search, or Google search and search partners at the campaign level. Bing enables you to target ads for just Bing & Yahoo, just search partners, or both at the ad group level. You can also easily run a report and see which search partners are bringing traffic to your post-click landing page or website.
5. Better social extensions: Although Google AdWords does allow your ads to showcase your Google+ followers, the problem is the network doesn’t really have that many followers, to begin with. Bing, on the other hand allows you to show your social media following, such as Twitter followers.
Convinced that running a paid campaign on Bing is a good idea? Let’s begin the account set-up process.
When you decide to run campaigns in Bing, the ads appear at the top of or to the right side of Bing, Yahoo, and MSN search results.
Getting started with Bing ads
The First thing you need to do is create an account on Bing.
Once you’ve successfully created an account, you’ll have the following options:
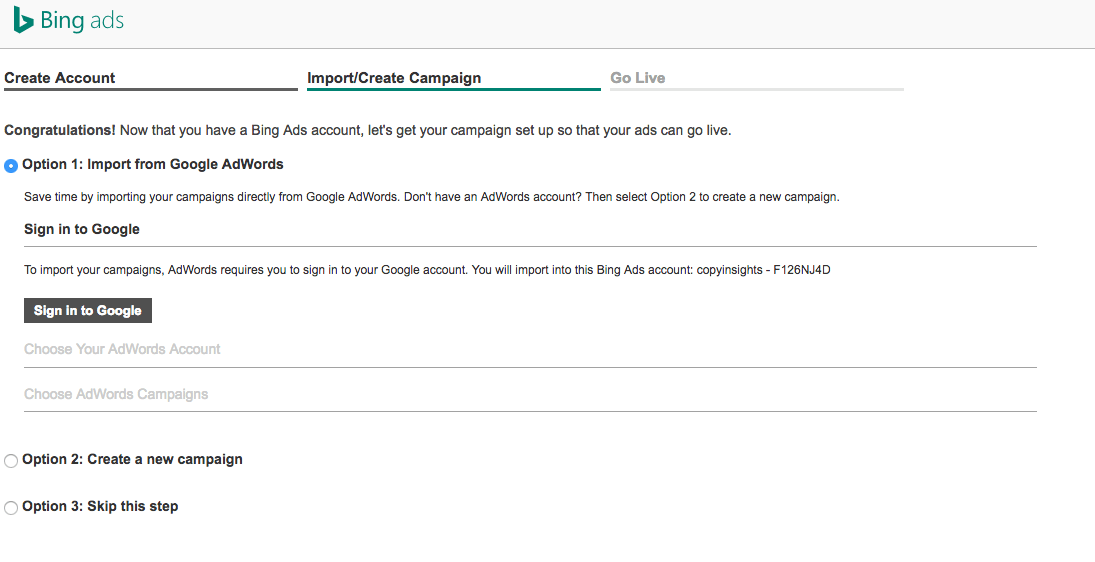
If you’re looking to import a campaign from Google AdWords, you can save time and click Option 1. If you’re looking to create a brand-new campaign with Bing, select Option 2.
Step 1: Campaign Settings
This step involves filling in your campaign settings:

Campaign name
You have to choose a campaign name, this is a unique name for your campaign that is centered on a single goal. It’s ideal if your campaign name is relevant to the goal you’re trying to achieve.
Language
You then have the option to select the language you will use to write your ads, essentially the language your target audience uses, as Bing doesn’t translate ads or keywords. The ad language determines where your ads can appear.
For example, if you have selected French as the language, the ads will appear in Bing Network web pages in France, Belgium, Canada, Luxembourg, but not in Spain.
Another thing to remember is that you can’t change the language, once you’ve selected and saved it – so, choose wisely. If you want to run ads in multiple languages, it’s best to create a separate campaign for each language.
Location
The location option determines where you want the ads to appear. You can either choose the US, all available countries/regions or choose specific locations.
When choosing a specific location, you also need to specify who you want to see the ads – people in your targeted locations or people searching for viewing pages about your targeted locations:

Location targeting helps you show your ads to the right audience, so you aren’t paying for clicks from people who have no intent of buying your product/service. For example, if you are a local business you should target your location accordingly, as showing your ad to people living in a different state won’t help you achieve your marketing goal.
Step 2: Ads & keywords
Bing campaigns consist of ad groups, and ad groups are made of sets of keywords and ads. This step allows you to create your first ad group (including both ads and keywords).
Ad group name
The first thing to enter is the ad group name, this is a unique name for this particular ad group. Your campaigns can consist of one or more ad group. Each ad group is based on the campaign theme.
Create ad
You can now create your ad:

It’s always best to include keywords in your ad copy, so your target audience finds your ads relevant and are enticed to click. We’ll discuss more on how to optimize Bing ads in the next section of the chapter.
Final URL
While creating the ad you need to add the Final URL – which is your post-click landing page URL i.e. the link of the page that a visitor will come to after the ad click.
Ad titles
Bing expanded text ads allow you to add two titles in your ads – Ad title 1 and Ad title 2. Each ad title can be up to 30 characters long and are separated by a hyphen. You can also add dynamic text in ad titles – dynamic text is a word or phrase inserted into the ad title or ad text that matches the text the user types in the search engine.
Path
The path is a simplified web page address that is showcased in your ads, it should give users a clear idea of where they’ll go after they’ve clicked the ad.
2. Ad Text
Ad text is the copy that appears below the path in your Bing ad. Your ad text should feature copy that explains to users how your product/service can help solve their problem. You can also insert a call to action in your ad text to convince visitors to click. The ad text has a character limit of 80.
Mobile URL
The mobile URL is the webpage where users are directed to after they’ve clicked the ad from a mobile device.
Preview ad
After you’ve filled the appropriate fields, you are able to view your ad in different placements:

Enter keyword
Keywords are the words and phrases associated with your ads so users typing particular search queries can find your ads. To connect ads to the right audience, it is important to think like a customer and come up with keywords they would type while searching for a solution that your product/service solves.
In the enter keyword box, you can type or paste keywords separated by commas or just one keyword at a time. You can set the keyword match type by including brackets and quotes:
You can read the difference between the types of keywords in Chapter 2. (hyperlink here) Bing suggests having at least 20 keywords in each ad group. If you’re having trouble selecting keywords, simply take help from the ‘Get keyword suggestions’ option.
Keyword Suggestions
You can use keyword suggestions to pick out appropriate keywords for your campaign. Just enter a relevant word relevant to your campaign, or your website’s URL to see the suggested keywords.
For each suggested keyword, Bing also tells you how many times users searched the keyword every month, what the average CPC is, and how competitive the keyword is.
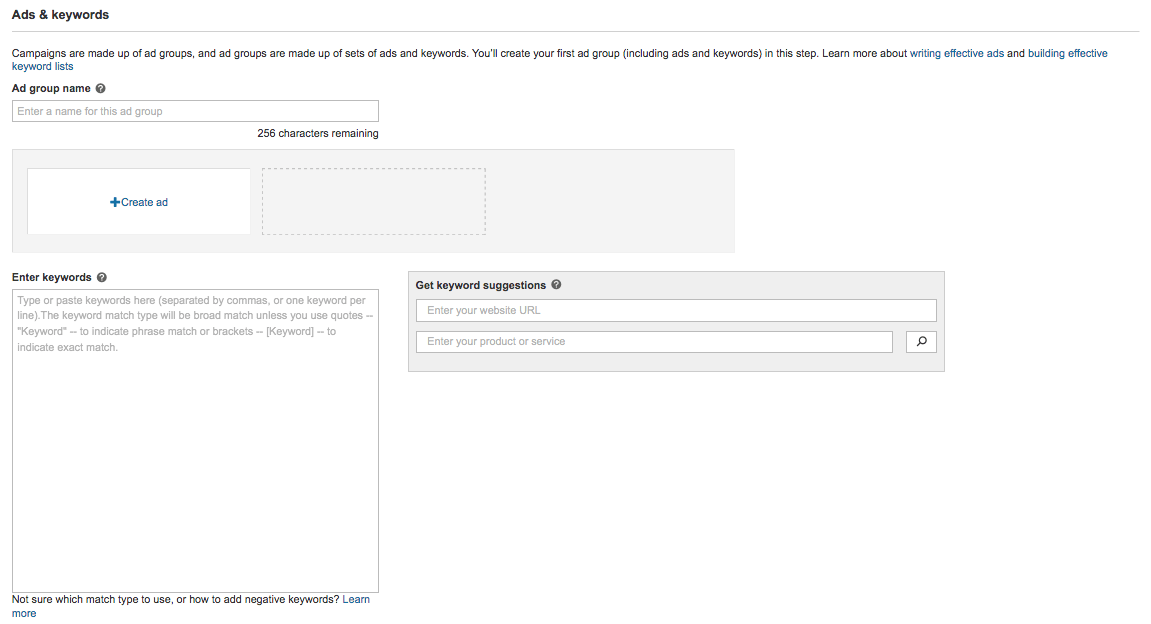
Step 3: Budget
You now need to fill in the maximum amount you want to pay for each ad click, and how much you’re comfortable spending on your ads on a daily basis.
Maximum cost per click
By selecting the maximum cost per click you’re determining the amount to pay for a click on one of your ads. The average CPC of Bing ads is about $0.84, you can set your CPC higher or lower than this based on your business type.
If you feel that your budget is being used up fairly quickly, it’s better to lower the CPC, if you have ample budget leftover you can raise your CPC amount.
Your CPC or PPC is the maximum amount you’ll pay every time a customer clicks your ad. You bid against other advertisers using the same keyword, so in general, higher bids help get your ad to display in more desirable locations on the search results page.
There are two bidding options you can choose from:
When you bid on a keyword, you can use the default bid for the ad group or you can enter a custom bid.
Custom bids for keywords override the ad group default bid for those specific keywords. With custom bids, you can focus your time and money on the most profitable keywords, but you will need to spend more time on managing the individual bids.
Campaign budget
The campaign budget sets the amount of money you want to spend on a daily basis. You have two options when you select daily budget:
1. Standard: Your budget is spent as evenly as appropriate throughout the course of the day.
2. Accelerated: Your budget is spent as quickly as appropriate.
Your ad campaign is now ready to go live, and you can start directing visitors to your post-click landing pages via the ads.
The next section of the guide is going to discuss how to create optimized Bing ads that get users to click.
Creating optimized Bing ads
Want users to pick out your Bing ad from the search engine results page? The first thing you need to consider is ad position.
Ad position is the position of your ad on Bing, AOL, or Yahoo search results page. Similar to Google Analytics (hyperlink here to relevant section), Bing ad position is determined by how your ad measures up to other competing ads.
The factors that determine ad position include:
1. Keyword bid: This is the amount you bid for your keyword. You set this up when selecting the budget for your campaign.
2. Ad relevance: How relevant your ad is to the search query the user typed.
3. Ad performance: Ad performance is measured by the ad’s click through rate on web pages. The click through rate is the ratio of the number of times an ad is clicked to the number of times the ad is displayed.
Here’s how ads appear in Bing, AOL, or Yahoo depending on ad position:

In addition to ad position, you should consider the following optimization techniques when creating ads:
Use keywords in the ad headline
Using keyword phrases which the user typed in the search engine in ad headlines reassures the user that your ad holds the answer to their question.
This is what Hootsuite does with their Bing ad:

Use specific and clear ad copy
There isn’t a lot of room for error when writing ad copy, because you only get to use a predetermined number of characters. The ad copy needs to clearly explain what the offer is about, while being specific about the details you know your target audience is most interested in.
This is what Insightly does with their ad:

The ad headline emphasizes that the service is easy to use, the copy reinforces this message with the phrase, ‘From Grandmas to Geeks’. The ad also mentions the price and the number of worldwide users.
Use a call to action
The right call to action has the power to persuade the user to take action. Make sure the CTA button copy you use in the ad is relevant to the offer being promoted. For example, if you’re promoting a free ebook – CTA copy that reads ‘Download Now’, or ‘Get a Copy’ works.
The Microsoft Project Online CTA, ‘Try it Free’ helps motivate the user to click:

Now that you know the optimization techniques you should consider while creating Bing ads, let’s discuss some things you need to avoid when creating Bing ads.
Random capitalization
Don’t randomly capitalize letters as it looks unprofessional. For example, copy like ‘Get a FREE sample TODAY’ won’t do anything to increase click through rate.
Unnecessary Punctuation
Adding a handful of exclamation marks next to a promotion you think is amazing isn’t going to make visitors think the same.
Instead of writing ‘50% off!!!!!Order Now!!!!!’, simply include the appropriate number of punctuation marks. If you want your ad to stand out, use copy that gets visitors curious about the offer and click the ad.
Not taking visitors to a dedicated post-click landing page
Getting the user to click the ad is only half the conversion battle. To ensure that they don’t leave after the ad click it’s necessary that you connect all your ads with dedicated post-click landing pages.
A post-click landing page is a dedicated page that’s created to promote a single offer. It’s the best place to direct visitors who’ve clicked your ad thinking about buying just that offer. The post-click landing page you direct visitors to after the ad click must have message match, and have the same message that was promoted in the ad.
This is what Freshdesk does with their ad and post-click landing page:

Here is the post-click landing page connected with the ad.

The ad and post-click landing page both highlight the 30-day free trial and the benefits of Freshdesk as a help desk tool.
Your post-click landing page should also have a conversion ratio of 1:1:
On a post-click landing page, conversion ratio refers to the number of places to click compared to the number of conversion goals. Ideally, the ratio is 1:1, meaning there’s only one place to click on your post-click landing page: the link that accomplishes your conversion goal. On the majority of post-click landing pages, that link is a call-to-action button.
Directing visitors to post-click landing pages that have message match and no navigation links increases the probability of conversions, resulting in a higher ROI for your paid search campaigns.
Bing ads is a powerful search advertising tool that is designed to get ads in front of your target audience. Bing ads appear on search networks such as Bing, Yahoo, AOL, within Windows devices, and within Windows apps.
Use Bing PPC marketing campaigns to advertise to your target audience by paying only when a visitor clicks an ad. Create optimized ad campaigns in Bing today to take advantage of the network’s user base and a lower CPC than Google AdWords.
LinkedIn is a networking site used by professionals from all across the globe. Making the network a uniquely focused avenue for B2B business to run their paid marketing campaigns.
On LinkedIn it’s all business, all the time.
LinkedIn is now home to 500 million professionals, out of which 10 million are opinion leaders and 61 million are senior-level influencers:

Choosing to use LinkedIn advertising gives you access to the following features:
Types of LinkedIn ads
LinkedIn gives you the option of creating three types of ads.
1. Sponsored Content
Sponsored content are native ads that have the same appearance as regular posts. With Sponsored Content, you can share posts to your company page with a targeted audience on the network. The ads help you raise awareness about your brand, build relationships, and drive leads.
This is what a typical sponsored content ad looks like:
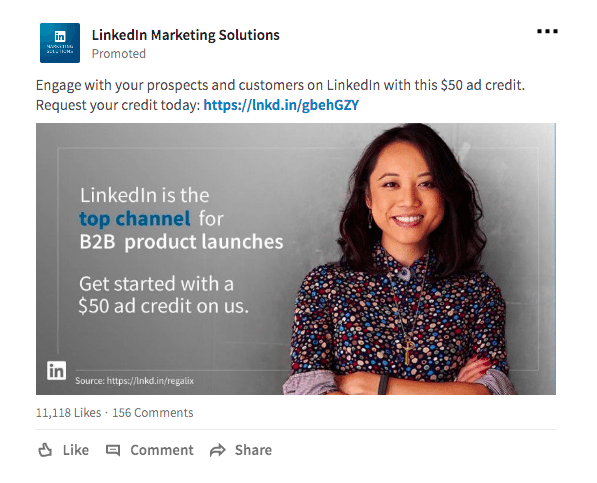
You should use sponsored content to:
2. Text ads
Text ads feature a headline, a description and an image and allow you to capture user attention and drive clicks by being short and succulent. The ads are a desktop only option, and work well if you’re looking to attract the attention of a busy LinkedIn professional.
The ads may appear under the “Promoted” section:

The ads can also appear as text link advertisements found at the top of the page:
![]()
With the help of text ads, you can promote job opening to a busy professional browsing through the network.
Using LinkedIn text ads presents you with the following advantages:
3. Sponsored InMail ads
Sponsored InMail ads allow you to send personalized messages to targeted LinkedIn users through LinkedIn Messenger and LinkedIn’s email client:

To ensure that your Sponsored InMail ads get noticed, LinkedIn only sends the recipients the emails when they are active on the network. The ads work if you’re looking for a more personalized approach to getting your target audience’s attention.
Getting started with LinkedIn ads
Before you start creating LinkedIn ads, the first thing you need is to set up an account. For running Sponsored Content ads, you also need to have a Company page:

Just enter your company name, a LinkedIn public URL and you’re done. Once you have the company page all set up, follow the steps mentioned below to start advertising on LinkedIn.
Choose your ad product
Select the type of ad product you’re interested in. You should consider using all three formats for maximum reach and impact:

Each option will require you to create a campaign name and choose your target audience language.
Let’s select the Text ads option for the purpose of this guide.
Set up account name
After you’ve selected an ad product, you’re required to select an account name and the currency. The currency you select for an account at this step cannot be changed later on, you can however create multiple Campaign Manager accounts with different currencies:

You also have the option of linking a Company or Showcase page with the text ad campaign.
Select campaign name and target audience language
This step requires you to select a campaign name, the campaign name will not be publicly displayed and will only be used to help you sort through multiple campaigns:

The audience you can potentially reach with your ads depends on the target audience language you select. Most advertisers select English as the default language to maximize the scale of their campaigns.
One thing to remember is that the ad copy should match the language you selected, if you’ve selected English as the audience language you can create ad copy in your available local language as well.
Create your ad
The first thing you need to select at this step is where you would like users to go after they click the ad. You have the option to send them to your LinkedIn page, or select a website.
You should opt to direct users who click your ad to a relevant post-click landing page instead of your website homepage.
A relevant post-click landing page highlights only the offer you’ve promoted in the ads, reassuring the visitor that they have come to the right place. Contrary to your website homepage, that is created to highlight all your offers, benefits and services, a post-click landing page is created to promote a single offer.
All post-click landing page elements are dedicated to highlight the promoted offer – starting from the headline down to the call to action button.
Let’s look at this Extreme Networks text ad as an example:
This is the post-click landing page visitors are brought to after the ad click:

All the post-click landing page elements are working toward promoting the offer highlighted in the ad. This would not have been the case if visitors had been directed to the Extreme Networks homepage:

The visitor would have to sift through a lot of navigation links and copy to get to the report they wanted to download. Directing visitors to a standalone post-click landing page ensures that they don’t have to work to get to the promoted offer, which isn’t something you should expect your visitors to do in any case.
After you’ve added your post-click landing page URL in the ‘My Website’ section, you can proceed to creating your LinkedIn text ad by adding a headline, image and copy:

Make sure to add an attention-grabbing headline in your text ads to entice the user to read the rest of the ad and eventually click. Try adding a statistic in the headline, or asking a question that piques their interest.
You can also mention the price of the product to get visitors to click, this is what Comcast business does:

Adding an image with your text ad helps you get up to 20% more clicks, the image you add should be relevant to the offer you’re promoting. This is what P&G does with their ad:

Including a call to action in your ad copy can help users spring into action, the copy should be relevant to the offer and personalized. eCornell’s ad’s CTA button copy ‘Apply Now’ helps convince users to click:

After you’re done creating the ad copy and uploading an image, LinkedIn shows you a preview of the ad copy, image, and headline you’ve created. The preview also showcases the ad in multiple placement positions:
Audience creation
It’s now time to define who you want to see your ads:

LinkedIn gives you the opportunity to use a matched audience, this is a custom targeting option to reach website visitors, contacts, and target audience. You can create an audience list for retargeting, or upload a list of companies or email addresses you want to target with your ads.
Select the location where your target audience resides. You can target by country, state, city, or town. You can also choose to include or exclude certain locations for your ads.
Now select a specific targeting criteria to create more laser-focused ad campaigns, you can target your audience based on:
LinkedIn also pre-selects the ‘Enable Audience Expansion’ option, the feature helps broaden the reach of your campaign by showing it to audience that have the same characteristics or attributes as the target audience you’ve selected.
You can also see your estimated target audience after you’ve selected all your targeting options:

Budget and schedule
This step involves choosing how much you want to spend and when you want your target audience to start seeing your ads:

You can choose to set up conversion tracking by installing an Insight Tag to gather insights into post click and view through conversions of your campaigns.
You can now select your bid type. With CPC, you only pay when a user clicks your ad. Your daily budget is the amount of money you’ve decided to spend for your ad campaign in a single day, the daily budget limit for LinkedIn is $10.
Once the daily budget is reached, your ads stop showing. However, there may be a short period of time your ads are still displayed after your daily budget is reached, you are charged for clicks at that time amounting to up to 20% of your daily budget.
After you’ve selected the daily budget, it’s time to select your bid. The bid is the maximum amount you’re willing to spend for each ad click. Because you’re competing with other advertisers for ad clicks, there is no determined net cost. So, the higher you bid the more competitive your campaign is in the auction.
Plus, with a high bid you are likely to receive more ad clicks, as your ad is shown more than the ads of the other advertisers.
Based on the audience you’ve selected, LinkedIn gives you an estimate of what amount other advertisers are bidding for a similar audience. The maximum bid amount is $2.
For ad schedule, you have two options – either start running your ads immediately, or choose a specific date for your ads to begin showing. You can also choose a campaign end date.
The ad rotation option allows you to select how to rotate your ads to test performance over time and optimize your campaign. You can select from the following two options:
1. Optimize for clicks: Better performing ads appear more often.
2. Allow ads to enter auction evenly: Your ads are entered into the auction evenly, this doesn’t guarantee that better performing ads will be displayed more often.
Measure and refine your LinkedIn ads
LinkedIn ads allows you to access a range of metrics that help you measure and optimize your campaigns. The metrics include impressions, clicks, and ad spend. The network also lets you measure “social actions,” the actions capture how LinkedIn members interact with your content, giving you an insight into how to create future LinkedIn campaigns.
LinkedIn should be your PPC advertising network of choice if you’re a B2B business. The network has a growing user base of professionals, plus it gives you the opportunity to target professionals with various variables such as seniority and job function. The performance measurement analytics help you see how your campaigns are doing and helps you make informed decisions about your future campaigns.
Pay-per-click marketing is an advertising bidding option that allows you to pay only when your audience clicks an ad. Depending on the advertising platform you choose, you get to set desired bids, choose keywords, target customers, and showcase ads to your target audience.
To ensure that your PPC campaigns yield a higher ROI, it’s important you connect all ads with relevant conversion-centric post-click landing pages. Haven’t created post-click landing pages yet?
Create one today with Instapage – a platform that empowers you to create fully customizable post-click landing pages that increase your conversion rates and ROI.
Try the world's most advanced landing page platform today.